Elizavecca Milky Piggy Carbonated Bubble Clay Mask: A Comprehensive Guide
This guide delves into the Elizavecca Milky Piggy mask‚ offering detailed instructions for optimal use‚ ensuring a bubbly‚ cleansing experience for radiant skin health.
The Elizavecca Milky Piggy Carbonated Bubble Clay Mask has garnered significant attention within the skincare community‚ celebrated for its unique carbonation action and effective pore-cleansing capabilities. Originating from South Korea‚ this mask distinguishes itself with its playful packaging – featuring an adorable pig – and promises a fun‚ yet powerful‚ skincare experience.
Many users initially seek guidance on how to use this mask correctly‚ as the bubbling effect can be surprising. Online resources‚ including beauty blogs and review sites‚ frequently highlight the importance of following the provided instructions‚ while also suggesting personalized approaches to maximize benefits. The mask’s popularity stems from its ability to address concerns like blackheads‚ enlarged pores‚ and dull skin‚ making it a staple in many skincare routines. It’s a product that consistently appears in “must-try” lists for those exploring K-beauty.
What is Carbonated Clay Mask?
Carbonated clay masks represent an innovative evolution in skincare‚ combining the deep-cleansing properties of traditional clay masks with the invigorating effects of carbonation. Unlike standard clay masks‚ these formulations contain ingredients that create a fizzy‚ bubbling sensation upon application. This effervescence isn’t merely for show; it’s designed to gently lift impurities‚ unclog pores‚ and enhance circulation.
The Elizavecca Milky Piggy exemplifies this type of mask‚ utilizing carbonation to aid in the removal of blackheads and excess sebum. Following instructions carefully is key to experiencing the full benefits. The bubbles help to deliver the clay’s purifying agents deeper into the skin‚ offering a more thorough cleanse. This technology makes carbonated clay masks particularly appealing for those with oily or acne-prone skin‚ seeking a deeper level of purification.
Key Ingredients and Their Benefits
The Elizavecca Milky Piggy mask boasts a potent blend of ingredients designed for deep cleansing and skin revitalization. Key components include charcoal powder‚ known for its exceptional ability to draw out impurities and toxins from pores; Additionally‚ it features kaolin clay‚ a gentle yet effective absorbent that helps control oil production.
Following instructions‚ users will find green tea extract‚ rich in antioxidants‚ to soothe and protect the skin. Carbonated water is central‚ creating the signature bubbling action that enhances ingredient delivery. These elements work synergistically to exfoliate‚ brighten‚ and refine skin texture. Proper application‚ as outlined in the instructions‚ maximizes these benefits‚ leaving skin feeling refreshed and revitalized.
Packaging and Product Overview
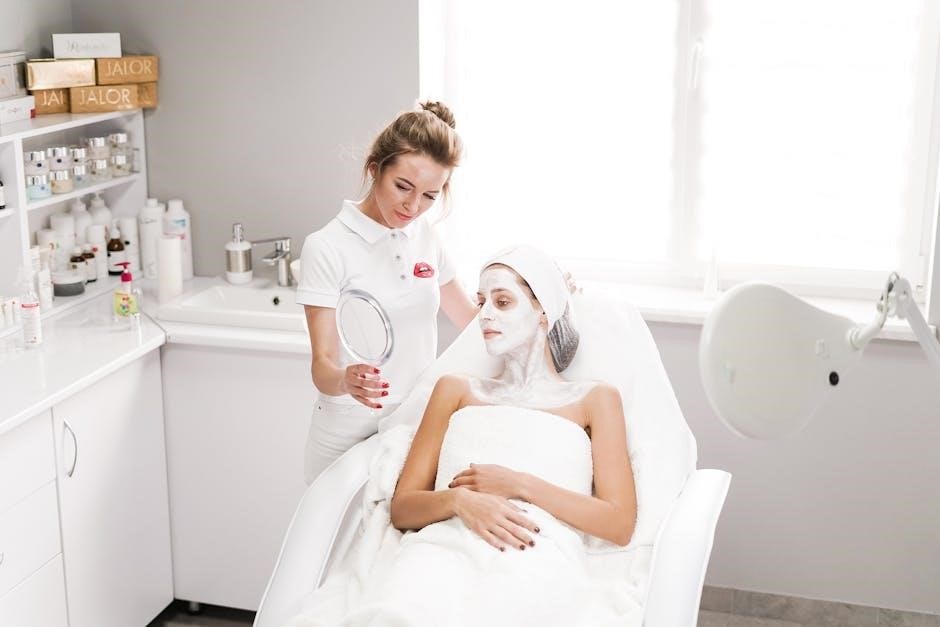
The Elizavecca Milky Piggy Carbonated Bubble Clay Mask arrives in charming‚ playful packaging featuring a cartoon pig donning a mask – instantly recognizable and endearing. It’s housed in a sturdy plastic jar‚ containing 100g (3.53oz) of the grey‚ clay-like product. Following instructions is crucial for best results.
The mask’s texture is smooth and spreadable‚ though it can feel slightly grainy due to the charcoal particles. Upon application‚ as the instructions detail‚ it begins to fizz and bubble‚ creating a unique and enjoyable experience. This carbonation aids in lifting impurities. The product’s consistency allows for even distribution across the face‚ avoiding the delicate eye area. It’s a fun‚ visually appealing mask promising a deep cleanse.
How to Use the Elizavecca Milky Piggy Mask: Step-by-Step Instructions
Follow these instructions carefully for optimal results: prepare skin‚ apply evenly‚ observe bubbling‚ rinse thoroughly‚ and complete with your regular skincare routine.
Step 1: Preparing Your Skin
Before applying the Elizavecca Milky Piggy Carbonated Bubble Clay Mask‚ proper skin preparation is crucial for maximizing its effectiveness. Begin with a gentle cleanser to remove any makeup‚ dirt‚ and excess oil from your face. This creates a clean canvas‚ allowing the mask’s ingredients to penetrate more deeply into your pores.
Following cleansing‚ consider a light exfoliation – once or twice a week – to remove dead skin cells. This further enhances the mask’s ability to unclog pores and brighten your complexion. However‚ avoid harsh scrubs immediately before use‚ as this could cause irritation.
To open pores and improve absorption‚ a warm towel or a quick steam session can be beneficial. Gently pat your skin dry with a soft towel‚ leaving it slightly damp. This ensures the mask adheres well and delivers its bubbling‚ cleansing power effectively. A well-prepared base is key to a successful masking experience!
Step 2: Applying the Mask
With your skin prepared‚ it’s time to apply the Elizavecca Milky Piggy Carbonated Bubble Clay Mask. Using clean‚ dry fingers or a mask brush‚ scoop out a moderate amount of the clay mask – approximately 1 to 2 tablespoons is usually sufficient. Avoid applying the mask to the delicate eye area or on open wounds.
Spread the mask evenly across your face‚ avoiding the eye contour and lips. A medium-thick layer is recommended; too thin‚ and the bubbling effect might be diminished. Ensure complete coverage‚ paying attention to areas prone to blackheads‚ such as the nose and chin.
The texture should feel cool and smooth upon application. Gently massage the mask onto your skin in circular motions for a few seconds to help with initial absorption. Remember‚ a consistent layer is vital for the carbonation process to work effectively and deliver optimal cleansing benefits.
Step 3: The Carbonation Process
Following application‚ prepare to witness the magic! Within seconds‚ you’ll notice tiny bubbles forming on the surface of the mask. This is the carbonation process at work – the clay reacting with air to create a fizzing sensation. This bubbling action is key to the mask’s deep-cleansing abilities.
The bubbling isn’t just for show; it helps to lift impurities‚ dirt‚ and excess sebum from your pores. You may feel a slight tingling sensation as the bubbles work their way across your skin‚ which is perfectly normal.
Observe as the mask transforms from a smooth clay to a lively‚ bubbly layer. This process indicates the mask is actively working to purify and refresh your complexion. Enjoy this unique sensation‚ knowing it’s drawing out impurities!
Step 4: Waiting and Observing the Bubbles
Allow the mask to remain on your skin for approximately 15-20 minutes‚ or until the bubbling subsides. During this time‚ relax and avoid excessive facial movements. The initial vigorous bubbling will gradually slow down as the mask continues to draw out impurities.
Pay attention to the bubbles; they’ll start small and become more numerous before diminishing. This indicates the mask is effectively working to cleanse your pores. You might feel a gentle tightening sensation as the clay dries‚ which is also normal.
Resist the urge to touch or disturb the mask while it’s working. Let it do its job! This waiting period is crucial for maximizing the mask’s benefits and achieving a thoroughly cleansed complexion.
Step 5: Rinsing Off the Mask
Once the bubbling has significantly decreased‚ and the mask feels dry to the touch‚ it’s time to rinse. Use lukewarm water – avoid hot water‚ as it can dry out your skin. Gently massage your face in circular motions while rinsing to help loosen any remaining clay.
Ensure all traces of the mask are removed‚ paying particular attention to the hairline and around the nose. A soft washcloth can be helpful for thorough removal‚ but avoid harsh scrubbing. The goal is gentle‚ complete cleansing.
Pat your skin dry with a clean‚ soft towel. Avoid rubbing‚ as this can irritate the skin. You should immediately notice a brighter‚ smoother complexion after rinsing off the mask.
Step 6: Post-Mask Skincare Routine
Following the mask‚ your skin is freshly cleansed and receptive to further treatment. Begin with a gentle toner to balance your skin’s pH levels. This prepares your skin for optimal absorption of subsequent products.
Next‚ apply your usual serum‚ focusing on ingredients that address your specific skin concerns – hydration‚ brightening‚ or anti-aging. Allow the serum to fully absorb before proceeding.
Finish with a moisturizer to lock in hydration and protect your skin barrier. A lightweight moisturizer is ideal‚ especially if you have oily or combination skin. Remember sun protection during the day!

Understanding the Mask’s Effects and Benefits
This mask deeply cleanses pores‚ removes blackheads‚ and gently exfoliates‚ revealing brighter‚ smoother skin with improved texture and a revitalized complexion.
Pore Cleansing and Blackhead Removal
The Elizavecca Milky Piggy mask excels at deep pore cleansing‚ effectively drawing out impurities and unclogging pores that contribute to blackheads. The carbonated bubbles work to lift away dirt‚ sebum‚ and dead skin cells lodged within the pores‚ making extraction easier and minimizing their appearance.
Applying the mask as directed – allowing the bubbles to fully activate – is crucial for maximizing this benefit. The bubbling action gently dislodges blackheads without harsh scrubbing‚ reducing the risk of irritation or damaging the skin. Consistent use‚ following the recommended frequency‚ can lead to visibly clearer skin and a reduction in blackhead formation over time. This mask offers a less abrasive approach to blackhead removal compared to traditional physical exfoliants.
Skin Brightening and Exfoliation
The Elizavecca Milky Piggy mask contributes to skin brightening through gentle exfoliation. As the carbonated bubbles work to cleanse pores‚ they simultaneously slough off dead skin cells from the surface‚ revealing fresher‚ brighter skin underneath. This process helps to improve skin tone and texture‚ diminishing the appearance of dullness and unevenness.
The mask’s formulation doesn’t rely on harsh abrasives‚ making it suitable for regular use without causing significant irritation. Consistent exfoliation promotes cell turnover‚ encouraging a more radiant complexion. Following the mask with a hydrating skincare routine is essential to maintain moisture balance and enhance the brightening effects. This gentle exfoliation aids in better absorption of subsequent skincare products.
Improved Skin Texture
The Elizavecca Milky Piggy mask noticeably refines skin texture through its deep cleansing and exfoliating action. The carbonated bubbles penetrate pores‚ dislodging impurities and dead skin cells that contribute to a rough or uneven surface. This process minimizes the appearance of pores‚ creating a smoother‚ more polished look.
Regular use helps to diminish the feeling of bumpy skin and promotes a softer‚ more supple texture; The mask’s clay base draws out excess oil and impurities‚ further contributing to a balanced and refined complexion. It’s crucial to follow the recommended usage frequency to avoid over-exfoliation and maintain skin’s natural barrier function. A consistent routine will yield long-term improvements in skin texture.
Addressing Different Skin Types
The Elizavecca Milky Piggy mask generally suits most skin types‚ but adjustments are key. For oily skin‚ it’s excellent for deep cleansing and minimizing pores. Combination skin users can focus application on the T-zone. Those with normal skin should use it 1-2 times weekly for maintenance.
Sensitive skin requires caution; a patch test is vital. Reduce application time and monitor for irritation. Dry skin types should follow with a rich moisturizer‚ as the mask can be slightly drying. Avoid overuse‚ regardless of skin type‚ to prevent stripping natural oils. Listen to your skin and adjust frequency accordingly for optimal results and comfort.

Potential Side Effects and Precautions
Always perform a patch test before full use‚ avoiding the eye area. Discontinue if irritation occurs‚ and limit frequency to prevent over-drying.
Sensitivity and Patch Testing
Before incorporating the Elizavecca Milky Piggy Carbonated Bubble Clay Mask into your regular skincare routine‚ conducting a patch test is absolutely crucial‚ especially if you have sensitive skin or a history of allergic reactions. Apply a small amount of the mask to a discreet area‚ such as behind your ear or on your inner forearm.
Leave the mask on for the recommended duration – typically 10-15 minutes – and then rinse thoroughly. Carefully monitor the area for any signs of adverse reactions over the next 24-48 hours. These reactions could include redness‚ itching‚ burning‚ swelling‚ or any other form of irritation.
If you experience any of these symptoms‚ immediately discontinue use and wash the affected area with cool water. A negative reaction indicates that you may be sensitive to one or more of the mask’s ingredients‚ and it’s best to avoid using the product altogether. Prioritizing this simple step can prevent potential discomfort and ensure a positive skincare experience.
Frequency of Use
Determining the ideal frequency of use for the Elizavecca Milky Piggy Carbonated Bubble Clay Mask depends largely on your skin type and its individual needs. While the mask offers impressive cleansing benefits‚ over-exfoliation can lead to dryness‚ irritation‚ and compromised skin barrier function.
For most skin types‚ incorporating the mask once or twice a week is a suitable starting point. Individuals with oily or acne-prone skin may benefit from slightly more frequent use‚ up to three times a week‚ but should closely monitor their skin’s response. Those with dry or sensitive skin should limit use to once every two weeks‚ or even less frequently.
Always adjust the frequency based on how your skin feels. If you notice any signs of irritation‚ reduce usage immediately. Consistent‚ moderate use will yield the best results without compromising skin health.
Avoiding Eye Contact
Crucially‚ when utilizing the Elizavecca Milky Piggy Carbonated Bubble Clay Mask‚ meticulous care must be taken to avoid contact with the delicate eye area. The mask’s formulation‚ while effective for cleansing‚ can cause significant irritation if it enters the eyes. The bubbling action further increases the risk of discomfort and potential harm.
During application‚ maintain a safe distance of at least one inch from the eyes and the immediate surrounding skin. If accidental contact occurs‚ immediately rinse the affected eye thoroughly with cool water for several minutes.
Persistent irritation warrants seeking medical attention. It’s advisable to have a damp cloth nearby during application for quick and easy cleanup should any stray product drift too close. Prioritizing eye safety ensures a pleasant and beneficial masking experience.

Comparing Elizavecca Milky Piggy to Other Clay Masks
Unlike traditional clay masks‚ the Milky Piggy offers a unique carbonation experience‚ providing a deeper cleanse and enjoyable sensation during the masking process.
Carbonated vs. Traditional Clay Masks
Traditional clay masks primarily rely on absorption to draw out impurities‚ offering a tightening sensation as they dry. However‚ the Elizavecca Milky Piggy Carbonated Bubble Clay Mask distinguishes itself through a fascinating process – carbonation. Upon application‚ the mask fizzes and bubbles‚ creating a gentle massaging effect.
This carbonation isn’t merely for fun; it actively lifts impurities and enhances circulation‚ potentially leading to a more thorough cleanse. The bubbles help to dislodge dirt and debris from pores‚ while the clay component absorbs excess oil. Many users find the bubbling sensation more comfortable than the sometimes-restrictive feeling of drying traditional clay masks.
Furthermore‚ the carbonation can aid in product penetration‚ allowing other beneficial ingredients within the mask to work more effectively. While both types offer pore-cleansing benefits‚ the Milky Piggy provides a unique and invigorating experience‚ making it a popular choice for those seeking a deeper‚ more dynamic treatment.
Price Point and Value
The Elizavecca Milky Piggy Carbonated Bubble Clay Mask generally falls within the affordable to mid-range price bracket for skincare‚ typically costing between $10 and $20 USD for a 100g jar. This makes it accessible for a wide range of budgets‚ especially considering its unique formulation and the enjoyable experience it provides.
Considering the quantity of product and the potential for multiple uses – depending on application thickness and frequency – the mask offers excellent value. Many users report achieving noticeable improvements in skin clarity and texture‚ justifying the cost.
Compared to professional facial treatments offering similar pore-cleansing benefits‚ the Milky Piggy mask presents a significantly more economical alternative. Its playful packaging and effective formula contribute to its overall appeal‚ making it a popular choice for skincare enthusiasts seeking a fun and effective treatment.
Alternatives and Similar Products
For those seeking alternatives to the Elizavecca Milky Piggy mask‚ several other carbonated clay masks are available. Popular options include the Saborino Speedy Beauty Mask‚ known for its quick application and brightening effects‚ and the Innisfree Super Volcanic Pore Clay Mask 2X‚ focusing on deep pore cleansing.
Traditional clay masks‚ like those from Origins or L’Oréal‚ offer a more classic approach to detoxification‚ though they lack the bubbling sensation. Charcoal masks‚ such as those by Bioaqua‚ provide similar blackhead removal benefits.
Ultimately‚ the best alternative depends on individual skin concerns and preferences. If the carbonation is key‚ exploring other brands offering this feature is advisable. If a simpler‚ more straightforward clay mask is desired‚ traditional options provide a viable substitute.
Where to Buy and Authenticity Checks
Purchase from official retailers or trusted online stores to guarantee authenticity‚ avoiding counterfeits and ensuring a genuine Elizavecca experience.
Official Retailers and Online Stores
Finding authentic Elizavecca Milky Piggy masks requires careful selection of retailers. Several online platforms consistently offer genuine products‚ providing a convenient shopping experience. YesStyle is a popular choice‚ known for its wide range of Korean beauty products and frequent sales. Stylevana also presents a reliable option‚ often featuring competitive pricing and promotions.
Amazon can be a viable source‚ but it’s crucial to verify the seller’s credibility and read customer reviews before purchasing. Look for listings fulfilled by Amazon directly or authorized distributors. Ulta Beauty occasionally carries Elizavecca products‚ offering the assurance of a reputable retailer. Additionally‚ Cosibella is a dedicated online store specializing in Korean skincare‚ ensuring product authenticity and providing detailed information. Always prioritize retailers with clear return policies and positive customer feedback to safeguard against counterfeit products.
Identifying Fake Products
Counterfeit Elizavecca Milky Piggy masks are unfortunately prevalent‚ demanding vigilance from consumers. Examine the packaging closely; authentic masks feature crisp‚ high-quality printing with accurate color representation. Discrepancies in font‚ logo placement‚ or overall design are red flags. Check the jar’s seal – it should be tightly secured without any visible damage or tampering.
The mask’s texture and scent can also reveal authenticity. Genuine masks have a smooth‚ consistent clay texture and a subtle‚ pleasant fragrance. Fake versions may feel gritty or have an unusual‚ chemical odor. Price is a key indicator; significantly lower prices compared to authorized retailers should raise suspicion. Finally‚ research the seller and read reviews carefully before purchasing‚ prioritizing reputable sources to avoid falling victim to fraudulent products.