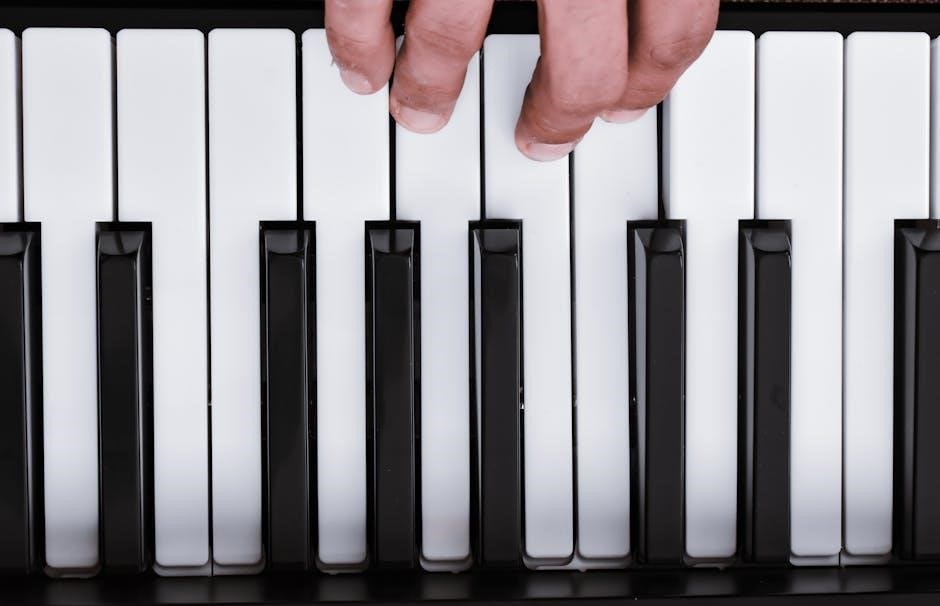
Piano chords are the foundation of harmonious music, requiring precise finger placement for optimal sound. Learning correct finger positions enhances technique and versatility, with downloadable PDF guides offering structured lessons and exercises to master chord fingerings efficiently.
Understanding the Basics of Piano Chords
Piano chords are groups of notes played simultaneously, forming the harmonic foundation of music. Mastering finger placement is essential for smooth transitions and clear sound. By using downloadable PDF guides, beginners can learn proper fingerings for major and minor chords, root positions, and inversions. These resources provide structured lessons and exercises, helping pianists build a strong technical foundation. Proper finger placement enhances speed, accuracy, and expressiveness, making it vital for effective chord playing and overall musical progress.
The Importance of Proper Finger Placement
Proper finger placement is crucial for pianists, enabling efficient transitions between chords and enhancing speed and accuracy. It forms the technical basis for expressive and precise playing, reducing fatigue and improving overall performance quality significantly.
Enhancing Technique and Efficiency Through Correct Finger Placement
Correct finger placement streamlines chord transitions, reducing finger stretching and fatigue. It fosters muscle memory, consistency, and precision, allowing pianists to play complex passages with ease and clarity. Proper finger placement enhances dexterity, enabling faster and more accurate chord changes. This fundamental skill is essential for building technical proficiency and expressive playing. Downloadable PDF guides provide structured exercises to master finger positions, ensuring efficient practice and gradual improvement in piano technique.

Finger Numbering System
The finger numbering system assigns digits 1-5 to each finger, aiding consistent chord fingerings. This standardized approach ensures clarity and precision in piano technique and instruction.
Assigning Numbers to Fingers for Effective Chord Playing
The finger numbering system is essential for effective chord playing, assigning numbers 1-5 to each finger. This standardized approach ensures consistency and clarity in chord fingerings, making it easier to learn and play complex chords. By understanding which fingers correspond to specific notes, pianists can navigate chord structures more efficiently. PDF guides often include detailed finger assignments, helping musicians master proper techniques and avoid common errors. This system is foundational for building proficiency in piano chord playing.
C Major Chord
The C Major Chord consists of the notes C, E, and G. To play it, place your right thumb on C, index finger on E, and middle finger on G. Ensure proper hand positioning for clarity and comfort, keeping wrists relaxed. Press all keys simultaneously for a clear sound. Practice finger placement and coordination to achieve a smooth, harmonious chord. Use downloadable PDF guides for precise finger positions and inversion techniques to enhance your practice.
Finger Positions for C Major Root Position
In the C Major root position, the right-hand thumb plays C, the index finger plays E, and the middle finger plays G. For the left hand, the fifth finger plays C, the third finger plays E, and the second finger plays G. Maintain a relaxed hand position, with wrists slightly lifted. Ensure fingers press the keys firmly for a clear sound. Practice this finger placement to build muscle memory and improve chord clarity. Downloadable PDF guides provide visual aids for precise finger positions and proper hand alignment.
Finger Positions for C Major Inversions
In the first inversion of C Major (E-G-C), the right-hand index finger plays E, the middle finger plays G, and the thumb plays C. For the left hand, the second finger plays E, the third finger plays G, and the fifth finger plays C. In the second inversion (G-C-E), the right-hand middle finger plays G, the thumb plays C, and the index finger plays E. The left hand uses the third finger for G, the fifth finger for C, and the second finger for E. Consistent practice of these finger placements ensures smooth transitions and clear chord sounds. Downloadable PDF guides provide detailed charts for mastering these inversions effectively.

G Major Chord
The G Major chord is a fundamental harmony in piano music. For the root position, the right hand uses fingers 1 (G), 3 (B), and 5 (D). The left hand mirrors this pattern, ensuring balanced sound and proper technique. Downloadable PDF guides provide clear finger charts for mastering the G Major chord in both root and inverted forms, enhancing your chord-playing skills effectively.
Finger Positions for G Major Root Position
Finger positions for the G Major root position are straightforward. For the right hand, place finger 1 on G, finger 3 on B, and finger 5 on D. The left hand mirrors this pattern, with finger 1 on G, finger 3 on B, and finger 5 on D. This ensures a balanced and clear sound. Proper finger placement is essential for maintaining clarity and avoiding muddiness. Downloadable PDF guides provide detailed charts for mastering the G Major root position effectively.
Finger Positions for G Major Inversions
G Major inversions require precise finger placement. In the first inversion, the right hand places finger 1 on B, finger 3 on D, and finger 5 on G. The left hand follows a similar pattern. For the second inversion, finger 1 on D, finger 3 on G, and finger 5 on B. Proper finger positioning ensures smooth transitions and clear harmonies; Downloadable PDF guides provide detailed charts for mastering G Major inversions, enhancing accuracy and musicality in your performances.

D Major Chord
The D Major Chord consists of D, F#, and A. Proper finger placement, as shown in downloadable PDF guides, enhances clarity and playing efficiency for both hands.
Finger Positions for D Major Root Position
The D Major Chord in root position consists of the notes D, F#, and A. For the right hand, place finger 1 on D, finger 3 on F#, and finger 5 on A. The left hand mirrors this pattern, with finger 5 on D, finger 3 on F#, and finger 1 on A. Proper finger placement ensures clarity and ease of playing. Downloadable PDF guides provide detailed diagrams for mastering these positions effectively.
Finger Positions for D Major Inversions
The first inversion of D Major places F# in the bass. For the right hand, finger 1 plays F#, finger 3 plays A, and finger 5 plays D. The left hand mirrors this with finger 5 on F#, finger 3 on A, and finger 1 on D. The second inversion positions A in the bass. Right hand: finger 1 on A, finger 3 on D, finger 5 on F#. Left hand: finger 5 on A, finger 3 on D, finger 1 on F#. Proper finger placement ensures smooth transitions between inversions. PDF guides provide clear diagrams for mastering these fingerings effectively, enhancing versatility in playing complex musical passages with precision and clarity.

A Minor Chord
The A minor chord consists of the notes A, C, and E. Proper finger placement is essential for playing this chord effectively, as it forms the basis of minor harmonies in various musical compositions.
Finger Positions for A Minor Root Position
In the root position of an A minor chord, the right-hand fingers are typically placed as follows: finger 1 on A, finger 3 on C, and finger 5 on E. For the left hand, finger 5 plays the A, finger 3 plays the C, and finger 1 plays the E. Proper hand alignment and finger curvature are crucial for clarity and ease of playing. This configuration allows for a balanced sound and smooth transitions between notes, enhancing overall technique and musicality.
Finger Positions for A Minor Inversions
Inversions of the A minor chord require adjusting finger placements to maintain a smooth sound. First inversion (C-E-A) uses right-hand fingers 1 on C, 3 on E, and 5 on A. Second inversion (E-A-C) places fingers 1 on E, 3 on A, and 5 on C. For the left hand, fingerings adapt similarly, ensuring each note is clear. These fingerings help in transitioning seamlessly between chords and creating fluid harmonic progressions, essential for expressive playing and technical accuracy.

E Minor Chord
The E minor chord is a fundamental harmony in music. Proper finger placement is essential for smooth, clear playing. PDF guides provide detailed fingerings for root position and inversions.
Finger Positions for E Minor Root Position
For the E minor root position, place your right-hand thumb on the E key, middle finger on G, and pinky on B. The left hand mirrors this pattern. Ensure fingers are curved for optimal reach and sound quality. This configuration allows smooth transitions to inversions. PDF guides provide visual aids for precise placement, helping pianists master the E minor chord efficiently. Proper finger positioning enhances clarity and resonance, essential for expressive playing.
Finger Positions for E Minor Inversions
In first inversion, the E minor chord is voiced as G-B-E. For the right hand, place your thumb on G, index on B, and middle on E. The left hand mirrors this pattern. In second inversion, the chord is B-E-G. Use your thumb on B, index on E, and middle on G for both hands. Proper finger placement ensures smooth transitions and clear sound. PDF guides provide detailed charts for mastering these inversions, enhancing your ability to play complex harmonies with precision and confidence.
Seventh Chords
Seventh chords add depth and emotion to music. They consist of a root, third, fifth, and seventh. Proper finger placement is crucial for smooth transitions and rich sound.
Finger Positions for C Major Seventh Chord
The C Major Seventh chord is played with the 1st, 3rd, 5th, and 7th notes of the C Major scale. For the right hand, use fingers 1 (C), 3 (E), 5 (G), and 7 (B) on the white keys. The left hand can mirror this pattern for inversion. Proper finger placement ensures clarity and resonance, making this chord a staple in harmonious compositions and improvisations.
Finger Positions for G Seventh Chord
The G Seventh chord combines the root, third, fifth, and seventh notes. For the right hand, fingers 1 (G), 3 (B), 5 (D), and 7 (F) are used. The left hand mirrors this pattern for inversions. Proper finger placement ensures smooth transitions and rich harmonies, making this chord versatile in various musical styles and essential for expressive playing.

Common Chord Progressions
Chord progressions use Roman numerals (I, ii, IV, V) to denote harmonic structure. Proper finger placement applies universally, enhancing musicality and expression in various keys and styles effectively.
Applying Finger Positions in Musical Contexts
Mastering finger positions is essential for executing chord progressions smoothly. Common progressions like I-IV-V rely on consistent finger placement to ensure seamless transitions between chords. For example, moving from C Major to G Major requires precise finger shifts to maintain clarity and rhythm. Using downloadable PDF guides, pianists can practice these patterns, reinforcing proper fingerings for both root and inverted chords. This practice enhances musicality, allowing for expressive and technically accurate performances across various musical genres and styles.
Practicing Scales for Improved Dexterity
Practicing scales strengthens finger dexterity and improves coordination, essential for smooth chord transitions. Use PDF guides to master proper fingerings and enhance your piano technique effectively.
Major Scales: C Major Scale Fingerings
Mastery of the C Major scale is foundational for pianists. Right-hand fingerings follow 1-2-3-1-2-3-4-5, while the left hand uses 5-4-3-2-1-2-3-4. This sequence ensures smooth, even playing across the keyboard. Downloadable PDF guides provide clear fingering charts for both hands, aiding in consistent practice and muscle memory development; Regular practice of the C Major scale improves dexterity, strength, and coordination, laying the groundwork for more complex scales and chord progressions. Consistent finger placement enhances accuracy and fluidity in performance.
Minor Scales: A Minor Scale Fingerings
The A minor scale, as the relative minor of C Major, shares its key signature. Right-hand fingering typically follows 1-2-3-1-2-3-4-5, while the left hand uses 5-4-3-2-1-2-3-4. Proper finger placement ensures smooth transitions and an even tone. Downloadable PDF guides provide detailed fingering charts for A minor, aiding in consistent practice. Regular practice strengthens dexterity and improves technique, allowing pianists to navigate minor scales with confidence and precision, enhancing overall musical expression and control.

Downloadable Resources
Downloadable PDF guides offer comprehensive lessons on piano chords and finger positions, providing structured exercises and fingerings for major and minor chords, enhancing technique effectively.
PDF Guides for Piano Chords and Finger Positions
Downloadable PDF guides provide comprehensive lessons on piano chords and finger placements, offering structured exercises and fingering charts for major and minor chords. These resources include detailed diagrams for root positions, inversions, and chord progressions, helping pianists master complex harmonies. Ideal for both beginners and advanced players, these guides enhance technique, improve dexterity, and offer a clear path to mastering piano chords. Consistent practice with these materials ensures efficient and expressive playing.
Visual Aids for Learning
Diagrams, charts, and infographics simplify understanding of piano chord finger placements, offering clear visual representations of chord structures and finger positions for effective learning and practice.
Using Diagrams and Charts to Reinforce Finger Placement
Visual aids like diagrams and charts are invaluable for mastering piano chord finger positions. They provide clear, at-a-glance representations of chord structures, finger numbers, and hand placements. These tools help learners quickly identify root notes, inversions, and finger assignments, making practice more efficient. diagrams often include color-coding or labels to highlight specific fingers or keys, ensuring clarity. By referencing these visuals, pianists can develop muscle memory and improve accuracy. charts also simplify complex chords, breaking them down into manageable parts for better understanding and execution.
Mastering Finger Positions
Consistent practice and slow, deliberate exercises build muscle memory, ensuring accurate and efficient chord transitions. Proper finger placement enhances speed and reduces fatigue, fostering musical expressiveness.
Consistency and Slow Practice Techniques
Mastering piano chord finger positions requires consistent practice, focusing on slow, deliberate movements to build muscle memory. Begin with individual chords, ensuring each finger presses the correct keys. Gradually increase speed as accuracy improves. Use a metronome to maintain steady rhythms while practicing scales and arpeggios. Regular review of chord charts and finger placement guides helps reinforce proper techniques, leading to smoother transitions and enhanced performance quality over time.
Exercises and Etudes
Structured exercises and etudes help refine finger dexterity and chord transitions. These practical applications of finger placement enhance harmonic understanding and improve overall technique effectively, fostering musical fluency.
Practical Applications of Finger Placement
Mastering finger placement enhances chord transitions and harmonic complexity. Practical exercises, such as playing scales and arpeggios, improve dexterity and coordination. Downloadable PDF guides provide structured lessons, while consistent practice ensures smooth execution of complex pieces. Slow practice techniques refine accuracy, allowing for expressive and efficient performances; These methods are essential for building a strong foundation in piano playing and mastering various musical styles effectively.
Common Mistakes to Avoid
Incorrect finger stretching, poor hand positioning, and ignoring proper fingering can lead to inefficiency and fatigue. Recognizing these errors early ensures smoother progression in mastering piano chords.
Recognizing and Correcting Finger Placement Errors
Incorrect finger stretching and poor hand alignment are common mistakes that hinder progress. These errors can lead to fatigue and inefficiency. To address this, identify improper placements during practice. Use downloadable PDF guides to compare correct fingerings with your technique. Regular review of chord charts and slow practice can help correct these issues. Consistent attention to proper finger placement enhances speed, accuracy, and overall musical expressiveness, ensuring a strong foundation for advanced playing.
Benefits of Proper Finger Placement
Proper finger placement boosts speed, efficiency, and accuracy, enabling smooth transitions between chords. It enhances musical expressiveness and reduces fatigue, allowing for more complex and nuanced performances.
Improving Speed, Accuracy, and Expressiveness
Proper finger placement significantly enhances speed by enabling smooth transitions between chords. Accuracy improves as precise finger control reduces errors in complex passages. Expressiveness flourishes through better dynamic and articulation control, allowing for nuanced performances. Efficient finger placement minimizes fatigue, enabling sustained practice and mastery of intricate pieces. By mastering these techniques, pianists achieve a polished and engaging sound, essential for captivating audiences and interpreting music effectively.
Mastery of piano chords begins with proper finger placement, essential for speed, accuracy, and expressiveness. Consistent practice and downloadable PDF guides ensure a strong foundation for lifelong musical growth.
Summarizing Key Points for Effective Learning
Consistent practice and proper finger placement are vital for mastering piano chords. Utilize downloadable PDF guides for structured learning, focusing on root positions and inversions. Slow, deliberate practice enhances technique, while understanding chord progressions applies fingerings musically. Regularly review scales and exercises to build dexterity. Correcting errors early prevents bad habits, ensuring efficient and expressive playing. Emphasize finger independence and hand positioning for optimal results, leveraging visual aids like diagrams to reinforce learning. Patience and dedication yield long-term improvement in piano chord mastery.


About the author