
Welcome to the Canon EOS R10 manual, your comprehensive guide to understanding and mastering this powerful mirrorless camera. This user-friendly manual covers setup, advanced features, and troubleshooting, ensuring you get the most out of your photography experience. Whether you’re a beginner or an experienced photographer, this guide will help you unlock the full potential of your Canon EOS R10. Explore the advanced user guide and quick start guide to discover how to optimize your camera’s performance and enhance your creative workflow.
1.1 Overview of the Canon EOS R10 Camera
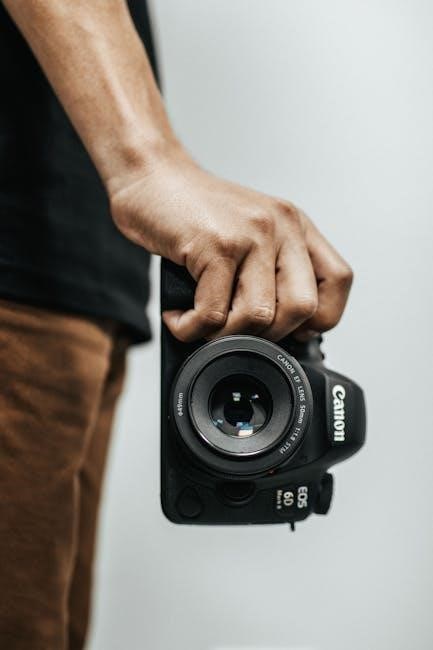
The Canon EOS R10 is a versatile APS-C mirrorless camera designed for both stills and video. It features a 24.2MP CMOS sensor, 4K video recording, and compatibility with Canon’s RF lenses. With its compact design, vari-angle LCD, and advanced autofocus, the R10 is ideal for photographers seeking a balance between performance and portability. It supports wireless connectivity and offers intuitive controls for enhanced creativity.
1.2 Importance of the User Manual
The Canon EOS R10 manual is essential for unlocking the camera’s full potential. It provides detailed instructions on setup, advanced features, and troubleshooting, ensuring optimal performance. Whether you’re a novice or experienced photographer, the manual offers insights into custom modes, autofocus techniques, and video capabilities, helping you achieve professional results and enhance your creative workflow effectively.
Key Features of the Canon EOS R10
The Canon EOS R10 is a versatile APS-C mirrorless camera featuring a 24.2MP CMOS sensor, 4K video recording, fast autofocus, and compatibility with Canon RF lenses for enhanced creativity and performance.
2.1 Technical Specifications
The Canon EOS R10 features a 24;2MP APS-C CMOS sensor, supporting up to 4K video recording at 60p. It offers a native ISO range of 100-32000, expandable to 51200. The camera utilizes the Canon RF lens mount, ensuring compatibility with a wide range of high-quality lenses. Its DIGIC X image processor enables fast autofocus and efficient image processing, making it ideal for both still photography and multimedia creations.
2.2 Advanced Shooting Modes
The Canon EOS R10 offers a variety of advanced shooting modes to enhance your photography experience. These include Manual (M), Aperture Priority (Av), Shutter Priority (Tv), and Program (P) modes, allowing precise control over exposure settings. Additionally, the camera features customizable (C) modes for quick access to personalized settings, as well as advanced options like in-camera focus stacking and HDR, catering to both stills and video workflows with ease and creativity.
2.3 Compatibility with RF Lenses
The Canon EOS R10 is fully compatible with Canon RF lenses, designed for the RF mount system. These lenses offer enhanced optical performance, faster autofocus, and improved communication between the camera and lens. The EOS R10 also supports EF and EF-S lenses via an optional EF-EOS R mount adapter, ensuring compatibility with a wide range of lenses to suit various shooting needs and creative vision.

How to Use This Manual
This manual provides a structured approach to understanding your Canon EOS R10. It includes detailed guides, tutorials, and troubleshooting tips to help you master the camera’s features. Whether you’re a beginner or an experienced photographer, this manual offers clear instructions to optimize your shooting experience. Access the manual online or download it as a PDF for convenience.
3.1 Navigating the Manual
Efficiently navigate the Canon EOS R10 manual by utilizing its organized structure. The manual is divided into clear sections, such as setup, features, and troubleshooting, making it easy to find specific information. Use the table of contents or search function to quickly locate topics like camera controls, shooting modes, or firmware updates. The manual is available both online and as a downloadable PDF, ensuring accessibility wherever you are. Familiarize yourself with the layout to maximize your learning experience and make the most of your camera’s capabilities. This guide is designed to be user-friendly, allowing you to navigate seamlessly through its comprehensive content.
3.2 Understanding Symbols and Conventions
The manual uses specific symbols and conventions to guide you through its content. Icons like warnings and notes highlight important information, ensuring safe and effective camera use. Refer to the “Symbols and Conventions” section for a detailed explanation of these markers. This section helps you interpret instructions accurately, making your learning experience smoother and more efficient. Understanding these symbols is key to fully utilizing the manual’s guidance.
Setting Up Your Canon EOS R10
This section guides you through unpacking, initial inspection, charging the battery, and setting the date, time, and language. Follow these steps to prepare your camera for use.
4.1 Unpacking and Initial Inspection
When unpacking your Canon EOS R10, carefully remove the camera body, battery, charger, and RF lenses. Inspect for any visible damage or defects. Ensure all accessories are included and undamaged. Handle the camera and lenses with care to avoid scratches or damage. This step ensures your equipment is ready for proper setup and use, providing a smooth start to your photography journey.
4.2 Charging the Battery
Locate the LP-E6NH battery and Canon charger from the box. Insert the battery into the charger, aligning the terminals correctly. Plug the charger into a power source and allow it to charge fully, which typically takes about two hours. Ensure you only use Canon-approved accessories to maintain performance and safety. The charger will indicate when the battery is fully charged and ready for use.
4.3 Setting the Date, Time, and Language
Navigate to the camera’s menu and select the setup or tools section. Choose the date, time, and language options to configure them according to your preferences. Use the touchscreen or control dial to select and confirm your settings. Ensure the date and time are accurate for proper file naming and EXIF data. The language setting allows you to customize the menu display for ease of use.

Basic Camera Operation
Master the fundamentals of your Canon EOS R10 with easy-to-use controls and intuitive menus; Learn basic shooting modes, navigation, and essential camera functions to start capturing stunning images.
5.1 Getting Familiar with the Camera Controls
Start by exploring the Canon EOS R10’s intuitive controls, including the mode dial, shutter button, and multi-controller. Familiarize yourself with the rear LCD screen, AF joystick, and customizable buttons. Understand the purpose of each control to streamline your shooting process and enhance creativity. Proper control layout knowledge ensures efficient operation during photography sessions.
5.2 Shooting in Automatic Modes
The Canon EOS R10 offers multiple automatic modes, such as Scene Intelligent Auto, for effortless photography. These modes analyze the scene and adjust settings automatically. Use the mode dial to select options like Auto, Creative Zone, or special scene modes. The camera handles exposure, focus, and color balance, allowing you to focus on composition. Adjust settings like brightness using the rear control dial for minor tweaks. The LCD screen provides real-time feedback, ensuring optimal results in various lighting conditions.
5.3 Basic Navigation and Menu Systems
Navigating the Canon EOS R10 is straightforward using its intuitive menu system. The rear LCD touchscreen allows you to access settings, adjust parameters, and review images. Use the Q/SET button to quickly access common settings like autofocus and ISO. The menu is divided into tabs for shooting, playback, and setup, making it easy to locate specific options. Customize your experience by adding frequently used settings to the My Menu tab for quick access. This streamlined interface ensures efficient operation during shooting sessions.
Advanced Features of the Canon EOS R10
Discover advanced features like custom shooting modes, enhanced autofocus, and 4K video capabilities, designed to elevate your photography and videography skills to professional levels effortlessly.
6.1 Custom Shooting Modes
The Canon EOS R10 offers customizable shooting modes, allowing users to tailor settings like exposure, ISO, and autofocus to suit their creative vision. These modes enable quick access to personalized configurations, making it easier to capture stunning images in various lighting conditions. Whether you’re shooting portraits, landscapes, or action, custom modes enhance your workflow and ensure optimal results every time. This feature is especially useful for photographers who prefer precise control over their camera settings.
6.2 Advanced Autofocus Techniques
The Canon EOS R10 features cutting-edge autofocus with advanced subject detection and tracking, utilizing deep learning technology to recognize people, animals, and vehicles. This ensures sharp focus in dynamic situations, while customizable AF zones and eye-tracking enhance precision. Users can also utilize manual focus overrides for creative control, making the R10 versatile for both stills and video, ensuring every shot is crisp and in focus, regardless of the scene’s complexity or speed.
6.3 Video Shooting Capabilities
The Canon EOS R10 excels in video production, offering 4K/30p and 1080p/120fps recording for smooth motion. It supports HDR-PQ for vibrant colors and features a vari-angle touchscreen for flexible framing. Advanced autofocus ensures sharp focus during recording, while image stabilization minimizes camera shake. With options for high frame rates and color grading, the R10 is ideal for content creators seeking professional-grade video performance in a compact form.
Working with Lenses
Explore the Canon EOS R10’s compatibility with RF lenses, designed for enhanced image quality and versatility. Learn proper attachment and detachment techniques, and discover how to use filters and accessories to optimize your photography experience.
7.1 Understanding RF Lens Compatibility
Discover how the Canon EOS R10 seamlessly integrates with RF lenses, designed for optimal performance and compatibility. These lenses offer advanced optical quality, faster autofocus, and enhanced communication between the camera and lens. The RF mount ensures a secure connection and supports future lens innovations, providing photographers with a versatile and reliable system for capturing stunning images.
7.2 Attaching and Detaching Lenses
To attach an RF lens to your Canon EOS R10, align the lens mount index with the camera’s mount mark. Gently rotate the lens clockwise until it clicks securely into place. For detachment, press and hold the lens lock pin while turning the lens counterclockwise. Always handle lenses with care to avoid damage and ensure proper alignment for optimal performance.
7.3 Using Lens Filters and Accessories
Enhance your photography with lens filters and accessories designed for the Canon EOS R10. Use UV filters to protect your lens and reduce glare, while polarizing filters enhance color saturation and contrast. Ensure filters are compatible with your RF lenses for proper fit. Avoid forcing filters onto lenses to prevent damage. Additionally, explore lens hoods and caps for protection against dust and scratches during storage or travel.

Accessories for Enhanced Functionality
Discover how accessories like memory cards, external flashes, and tripods can elevate your Canon EOS R10 experience. These tools expand functionality, ensuring optimal performance in various shooting conditions.
8.1 Recommended Memory Cards
For optimal performance with your Canon EOS R10, use high-quality SD/SDHC/SDXC memory cards with U3 or higher ratings. Cards like the SanDisk Extreme Pro or Lexar Professional are ideal for 4K video and burst shooting. Ensure cards are compatible with UHS-II standards for faster read/write speeds. Always choose cards with sufficient storage capacity to meet your photography needs. Refer to the manual for a full list of compatible memory cards.
8.2 External Flash and Lighting Options
The Canon EOS R10 supports external flashes for enhanced lighting control. Compatible options include the Speedlite EL-1 and EL-5, offering TTL metering and wireless connectivity; For studio setups, consider Canon’s Macro Ring Lite or third-party alternatives. Ensure compatibility with the R10’s hot shoe mount for optimal performance. Refer to the manual for a detailed list of supported flash units and lighting accessories.
8.3 Remote Shutter Release and Tripods
The Canon EOS R10 is compatible with the BR-E1 remote shutter release and various Canon tripods for stable shooting. Using a tripod ensures sharp images by minimizing camera shake, while the remote shutter release reduces vibration during exposure. These accessories are ideal for long exposures, time-lapses, or macro photography. Refer to the manual for a list of compatible tripods and remote release options to enhance your shooting experience.

Maintenance and Troubleshooting
Regular maintenance ensures optimal performance of your Canon EOS R10. Clean the camera and lenses, troubleshoot common issues, and update firmware to keep your device in top condition.
9.1 Cleaning the Camera and Lenses
Regularly clean your Canon EOS R10 camera and lenses to maintain image quality. Use a soft, dry microfiber cloth for the camera body. For lenses, apply a few drops of lens cleaning solution to a microfiber cloth and gently wipe in a circular motion. Avoid harsh chemicals or abrasive materials that could damage surfaces. For stubborn spots, lightly dampen the cloth with distilled water. Store your equipment in a protective case to minimize dust exposure and ensure optimal performance. Always handle your camera and lenses with care to prevent scratches or damage. Cleaning regularly will help preserve the clarity and precision of your photos. Additionally, use a soft-bristled brush to gently remove dust from the camera body and lens surfaces.

9.2 Common Issues and Solutions
Address common issues with your Canon EOS R10 to ensure optimal performance. If the camera displays an error code, restart it or check the memory card for damage. For autofocus malfunctions, clean the sensor or update the firmware. If images appear blurry, ensure the lens is clean and properly attached. Refer to the troubleshooting section in the manual for detailed solutions to resolve these and other common problems effectively.
9.3 Updating Firmware

Regularly updating your Canon EOS R10’s firmware ensures optimal performance and access to new features. Visit the Canon website to download the latest firmware version. Use a memory card to transfer and install the update, following the on-screen instructions carefully. Firmware updates may include improvements like the Cropping Guide feature. Keep your camera up-to-date to enjoy enhanced functionality and the latest advancements in photography technology.
This manual has guided you through the Canon EOS R10’s features, setup, and advanced functions. Regular updates ensure optimal performance. Master your camera and explore endless creative possibilities with confidence.
10.1 Summary of Key Points

The Canon EOS R10 manual provides a detailed overview of the camera’s features, setup, and advanced functions. It covers essential topics like initial setup, shooting modes, and maintenance. Regular firmware updates ensure optimal performance. This guide is designed to help users master the camera’s capabilities, from basic operations to advanced techniques, enabling them to capture stunning images and videos with ease and confidence.
10.2 Encouragement to Explore Further
Now that you’ve mastered the basics, explore the Canon EOS R10’s advanced features to unlock its full creative potential. Experiment with custom shooting modes, advanced autofocus techniques, and video capabilities. For deeper insights, visit Canon’s official website or join photography communities to discover new techniques and stay updated on the latest firmware and accessories. Keep exploring to enhance your photography and videography skills!


About the author