Monthly Archive March 31, 2026

Byvella

midnight at the oasis yuma 2024 schedule pdf

Midnight at the Oasis Yuma 2024 Schedule: A Comprehensive Plan

The official 2024 schedule in PDF format will be available soon! Expect detailed event timings, admission costs, and a complete listing of attractions.

Updates and changes to the schedule will be promptly posted on the event website and social media channels, ensuring attendees have the latest information.

Overview of the Event

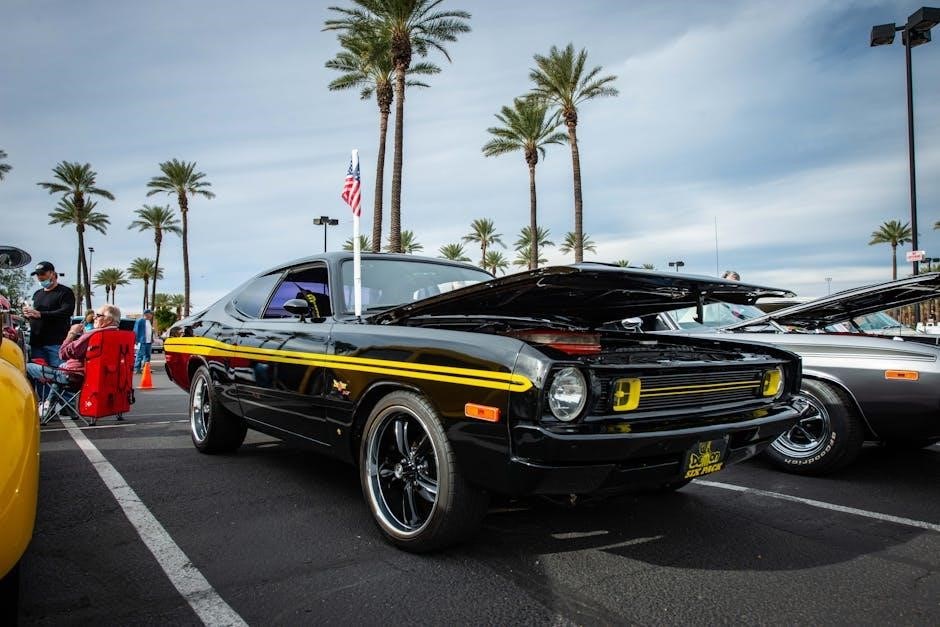
Midnight at the Oasis is Yuma’s premier classic car show and entertainment festival, organized by the Caballeros de Yuma. The event transforms Downtown Yuma and Desert Sun Stadium into a vibrant hub of activity each March.

Attendees can anticipate a spectacular display of vintage automobiles, live music, and the renowned Yuma Rotary Tri-Tip sandwich sales. The 2024 schedule, soon available as a PDF, will detail all happenings. Sponsorship opportunities are available, offering car recognition and awards!

Admission fees vary based on arrival time.

Event Dates and Location

Midnight at the Oasis consistently takes place on the first full weekend in March, encompassing Friday, Saturday, and Sunday. The 2024 event dates are confirmed, with the detailed schedule, including times and locations, soon to be released in a convenient PDF format.

Primary locations include vibrant Downtown Yuma, expansive Desert Sun Stadium, and the designated parade route. The PDF schedule will pinpoint exact locations for each activity. Admission costs depend on arrival time.

Specific Dates: First Full Weekend in March

Midnight at the Oasis 2024 was held from March 1st to March 3rd, marking the first full weekend of the month. The comprehensive event schedule, detailing each day’s activities, will be available as a downloadable PDF.

This PDF will outline specific times for the classic car show, entertainment performances, and the popular Yuma Rotary Tri-Tip sandwich sales. Keep an eye on the event website for the schedule’s release!

Primary Locations: Downtown Yuma & Desert Sun Stadium

Midnight at the Oasis 2024 encompassed two key locations: vibrant Downtown Yuma and the expansive Desert Sun Stadium. The detailed event schedule PDF will map out activities across both venues.

The parade route is also a significant area, detailed within the PDF. Attendees can easily plan their visit, knowing where to find the classic car show, entertainment, and food vendors at each location.

History of Midnight at the Oasis

Midnight at the Oasis boasts a rich history, founded by the Caballeros de Yuma. The 2024 schedule PDF will subtly acknowledge this legacy, perhaps with a historical timeline or founding organization mention.

Over the years, the festival has evolved, growing in size and scope. While the PDF focuses on the current schedule, understanding its origins adds depth to the experience. It’s a celebration of Yuma’s heritage!

Origins and Founding Organization: Caballeros de Yuma

The Caballeros de Yuma are the driving force behind Midnight at the Oasis. The 2024 schedule PDF will likely feature their logo and a brief acknowledgment of their founding role.

Their dedication ensures the event’s continued success. While the PDF primarily details event timings, recognizing the Caballeros highlights the community spirit. It’s a testament to their long-standing commitment!

Evolution of the Festival Over the Years

The 2024 schedule PDF won’t detail the festival’s full history, but it represents the culmination of years of growth. Midnight at the Oasis has evolved from humble beginnings into a major Yuma event.

Past iterations have expanded entertainment and car show elements. The PDF reflects this evolution through a more comprehensive event listing. It showcases the festival’s enduring appeal and continued innovation!

Key Event Components

The 2024 schedule PDF will clearly outline the core components of Midnight at the Oasis. Expect detailed timings for the Classic Car Show, a highlight for enthusiasts. The entertainment schedule, featuring diverse acts, will be fully listed.

Furthermore, the PDF will note the Yuma Rotary’s famous Tri-Tip Sandwich sales times and locations. It’s a convenient guide to experiencing all the festival’s key attractions!

Classic Car Show

The 2024 schedule PDF will dedicate significant detail to the Classic Car Show. It will specify show hours each day, outlining when judging commences and award presentations occur.

Major sponsors gain a unique benefit – the opportunity to select a favorite car for special recognition and an award, as detailed within the PDF. Expect a comprehensive listing of participating vehicles!

Entertainment Schedule

The 2024 schedule PDF will feature a complete breakdown of entertainment acts performing throughout the weekend. It will list performance times, stage locations (Downtown Yuma & Desert Sun Stadium), and artist details.

Attendees can plan their experience around preferred performers using this detailed guide. Expect a diverse range of entertainment options, all conveniently outlined within the downloadable PDF document for easy access!

Tri-Tip Sandwich Sales (Yuma Rotary)

The 2024 schedule PDF will clearly indicate the times and locations where Yuma Rotary’s famous Tri-Tip sandwiches will be available for purchase. Details regarding service hours from March 1st to 3rd, 2024, will be included.

This popular fundraising event’s schedule will be easily accessible within the PDF, allowing attendees to plan their meals accordingly and support the Yuma Rotary Clubs’ charitable initiatives!

Ticket Information and Admission Fees

The 2024 schedule PDF will contain a comprehensive breakdown of admission fees, varying based on the time of arrival. Specific pricing for Friday, Saturday, and Sunday access will be clearly outlined within the document.

Information regarding where to purchase tickets – online, at the gate, or through pre-sale locations – will also be detailed. Attendees can easily find the most cost-effective options using the PDF guide!

Varying Admission Costs Based on Timing

The 2024 schedule PDF will illustrate how admission fees fluctuate throughout the weekend. Early bird access, typically on Friday, may offer reduced rates compared to peak times on Saturday.

Sunday pricing could differ again, potentially offering a lower cost as the festival nears its conclusion. The PDF will clearly delineate these tiered pricing structures, helping attendees plan their visit and budget accordingly for optimal savings!

Where to Purchase Tickets

The 2024 schedule PDF will contain direct links to official ticket vendors once available. Anticipate online purchasing options through the Caballeros de Yuma website and potentially authorized ticketing platforms.

Information regarding potential physical ticket locations in Yuma will also be included. Check the PDF frequently as ticket sales are announced – don’t miss out on securing your entry to this fantastic event!

Sponsorship Opportunities

The 2024 schedule PDF will detail various sponsorship levels and associated benefits. Major sponsors gain the exclusive opportunity to select a favorite car for special recognition and an award during the festival.

Becoming a sponsor supports the Caballeros de Yuma and enhances the event. The PDF will include contact information for sponsorship inquiries and a breakdown of each package’s advantages.

Benefits of Sponsorship

The 2024 schedule PDF outlines sponsorship benefits, including prominent logo placement and event recognition. Major sponsors enjoy the unique privilege of selecting a favorite classic car for a dedicated award.

Sponsorship directly supports the Caballeros de Yuma’s community initiatives and ensures a vibrant festival experience. The PDF details each tier’s specific advantages, maximizing sponsor visibility and impact.

Car Recognition and Awards for Sponsors

The 2024 schedule PDF highlights a key sponsor benefit: the opportunity to personally recognize a participating classic car. Major sponsors gain exclusive rights to select their favorite vehicle for a special award presentation.

This unique feature enhances sponsor engagement and provides a personalized connection to the heart of the festival – the stunning classic car show. Details regarding award categories are available within the PDF.

Detailed Schedule of Events (2024)

The comprehensive 2024 schedule PDF outlines events spanning Friday, Saturday, and Sunday. It details timings for the classic car show, entertainment performances, and the popular parade route through downtown Yuma.

Admission fees are clearly indicated, varying based on arrival time. The PDF provides a complete overview, allowing attendees to plan their visit effectively and maximize enjoyment of the festival’s offerings.

Friday Events

The 2024 schedule PDF will detail Friday’s kickoff events, including the initial classic car show displays and opening entertainment. Expect information on specific performance times and locations within Desert Sun Stadium and downtown Yuma.

Early bird admission pricing, as outlined in the PDF, will be available. The document will also specify any Friday-exclusive activities or vendor offerings, ensuring a well-planned start to the festival weekend.

Saturday Events

The comprehensive 2024 schedule PDF will showcase Saturday as the festival’s peak, featuring the full classic car show competition and a diverse entertainment lineup. Detailed timings for performances and judging will be included, alongside the parade route information.

Admission fees for Saturday, varying based on arrival time, will be clearly stated within the PDF. Expect details on all food vendor locations and the Yuma Rotary’s Tri-Tip sandwich sales schedule.

Sunday Events

The 2024 schedule PDF will outline Sunday’s activities, including the awards ceremony for the classic car show, recognizing sponsor-selected favorites and overall winners. Entertainment will continue, though potentially at a reduced capacity compared to Saturday.

Specific timings for the awards presentation and final performances will be detailed. The PDF will also reiterate admission costs and highlight any remaining food and beverage options available throughout the day.

Accessibility Information

The 2024 schedule PDF will include a dedicated section detailing handicap accessibility provisions at both Downtown Yuma and Desert Sun Stadium locations. This will cover parking, restroom facilities, and access routes for individuals with mobility challenges.

Information regarding accommodations for other disabilities will also be provided. Attendees requiring specific assistance are encouraged to contact the Caballeros de Yuma directly, details found within the PDF, for pre-event arrangements.

Handicap Accessibility Details

The 2024 schedule PDF will outline designated handicap parking areas at both Downtown Yuma and Desert Sun Stadium, clearly marked for convenient access. It will also detail accessible restroom locations, including the number of stalls available.

Ramp access points and accessible routes throughout the event grounds will be visually represented. For specific questions or to request additional accommodations, contact information for accessibility coordinators will be included within the PDF document.

Food and Beverage Options

The 2024 schedule PDF will feature a dedicated section listing all food and beverage vendors, including locations within Downtown Yuma and Desert Sun Stadium. A highlight will be the Yuma Rotary’s renowned Tri-Tip Sandwich booth, with operating hours clearly indicated.

The PDF will also provide details on other available food options, ranging from classic festival fare to diverse culinary choices. Information regarding beverage vendors and any associated age restrictions will be included for attendee convenience.

Yuma Rotary Tri-Tip Sandwiches

The 2024 schedule PDF will prominently display the Yuma Rotary’s Tri-Tip Sandwich booth details. Specific operating hours for Friday, Saturday, and Sunday will be listed, ensuring attendees don’t miss out on this local favorite.

The PDF will also indicate the booth’s precise location within the event grounds. Details regarding payment methods accepted by Yuma Rotary will be included, alongside any pre-ordering options if available.

Other Food Vendors

The comprehensive 2024 schedule PDF will feature a dedicated section listing all participating food vendors beyond the Yuma Rotary. This will include vendor names, cuisine types, and booth locations within Downtown Yuma and Desert Sun Stadium.

Operating hours for each vendor will be clearly indicated, allowing attendees to plan their meals accordingly. The PDF may also include links to vendor websites or social media pages for menu previews and further information.

Exhibitor Information

The 2024 schedule PDF will contain essential details for prospective exhibitors. This includes exhibition fees, booth sizes, and setup/teardown times. A dedicated section will outline the application process and deadlines for securing exhibition space.

Contact information for the exhibitor coordinator will be prominently displayed within the PDF, facilitating direct communication for inquiries. The document will also specify any restrictions on exhibited items or promotional activities.

Exhibition Fees

The 2024 schedule PDF will clearly detail all exhibition fees. Costs vary based on booth size and location within the event grounds. Early bird discounts and package options may be available, as outlined in the document.

Specific fees for electricity, internet access, and additional booth features will also be listed. Payment methods accepted and refund policies will be clearly stated within the PDF for exhibitor convenience and transparency;

Contact Information for Exhibitors

The 2024 schedule PDF will contain dedicated contact details for all exhibitor inquiries. This includes a specific email address and phone number managed by the Caballeros de Yuma exhibition team;

Exhibitors can direct questions regarding booth setup, logistics, and any other concerns to these provided channels. Further contact information for general event inquiries will also be included within the downloadable PDF document for ease of access.

Contact Information & Resources

The complete 2024 schedule PDF will feature essential contact details for the Caballeros de Yuma, the organizing body. This includes their official email address and a dedicated phone line for event-related questions.

Links to the event website and active social media pages will also be prominently displayed within the PDF. Attendees can find the most up-to-date information and connect with the event community through these online resources.

Caballeros de Yuma Contact Details

The 2024 schedule PDF will list the Caballeros de Yuma’s contact information for inquiries. While specific details aren’t currently publicized, expect an email address for general questions and potentially a phone number for urgent matters.

Attendees seeking further assistance regarding the event, sponsorship opportunities, or exhibitor information can utilize these provided channels. The PDF serves as a central resource for connecting with the festival organizers directly.

Event Website and Social Media Links

The 2024 schedule PDF will likely contain links to the official Midnight at the Oasis website and associated social media pages. These platforms will host the most up-to-date information, including any schedule modifications or important announcements.

Follow their Facebook, Instagram, or Twitter accounts for real-time updates, event photos, and direct communication with the organizers. Check these resources frequently as the event approaches for the latest news!

2024 Winner Spotlight: Caballeros de Yuma

The Caballeros de Yuma, the founding organization, were recognized for their outstanding work in hosting Midnight at the Oasis in 2024. Details regarding the winner selection process and criteria may be included within the comprehensive 2024 schedule PDF.

Their dedication ensures a fantastic event experience. Sponsors also have the unique opportunity to recognize their favorite cars, contributing to the festival’s celebratory atmosphere!

Future Event Dates: Midnight at the Oasis 2026

Mark your calendars! Midnight at the Oasis is planned to return in 2026, continuing its tradition on the first full weekend in March. While the 2024 schedule PDF details current plans, anticipate similar exciting attractions in 2026.

Keep an eye on the event website for updates and the eventual release of the 2026 schedule. Sponsorship opportunities will also become available closer to the event date!

PDF Schedule Availability

The comprehensive 2024 schedule in PDF format is coming soon! This document will detail all event timings, locations – including Downtown Yuma and Desert Sun Stadium – and associated admission fees.

Attendees can locate the official PDF on the Caballeros de Yuma event website. Regularly check for updates, as the schedule may be subject to minor changes. Stay informed for a fantastic experience!

Locating the Official 2024 Schedule PDF

The official 2024 Midnight at the Oasis schedule PDF will be prominently featured on the Caballeros de Yuma event website. Look for a dedicated “Schedule” or “Downloads” section.

Direct links will also be shared across all official social media platforms. Ensure you are accessing the schedule from trusted sources to guarantee accuracy and avoid outdated information. Download and save for easy reference!

Updates and Changes to the Schedule

Any modifications to the 2024 Midnight at the Oasis schedule will be swiftly communicated. Check the event website frequently for the most current PDF version.

Follow Caballeros de Yuma on social media for real-time announcements regarding adjustments to timings, locations, or event details. Notifications will also be sent to those who have registered for event updates.

Byvella

2013 f 150 user manual

Navigating your 2013 F-150 is easier with the right resources! Accessing the factory service manuals – including the main volume, wiring diagrams, and engine diagnostics – is crucial for ownership․

Overview of the 2013 F-150 Model

The 2013 Ford F-150 remains a popular and robust truck, benefiting greatly from a comprehensive understanding of its systems․ While a primary service manual exists, it’s important to recognize it doesn’t encompass all information․ Specifically, separate volumes detail wiring schematics and in-depth engine diagnostics․

Ford Service provides access, often on a limited-time basis, to these crucial PDFs․ Owners seeking complete repair and maintenance knowledge should be aware of these three distinct, yet interconnected, manual components for optimal vehicle care․

Importance of the User Manual

A thorough understanding of your 2013 F-150’s manuals is paramount for effective maintenance and repair․ The factory service documentation isn’t a single entity; it’s a three-part system․ The core manual provides general service, but lacks detailed wiring diagrams and specific engine diagnostic procedures․

Accessing these supplemental resources, often through Ford Service’s subscription model, empowers owners and technicians alike․ Ignoring these resources can lead to inaccurate repairs and potentially compromise vehicle safety and performance․

Vehicle Identification & Key Information

Locate your 2013 F-150’s Vehicle Identification Number (VIN) and understand the vehicle labels; these are essential for accessing correct service information․

Vehicle Identification Number (VIN) Location

Identifying your 2013 Ford F-150’s unique VIN is a critical first step for service, warranty work, and accessing the correct owner’s manual information․ The VIN is typically located on the driver’s side dashboard, visible through the windshield․

It’s also found on the driver’s side door jamb sticker and may be present on the frame․ Keep this 17-character code readily available when contacting Ford dealerships or utilizing online resources for parts or repair information․ Accurate VIN verification ensures compatibility․

Understanding Your Vehicle’s Labels

Your 2013 F-150 features several important labels providing vital information․ The Vehicle Certification Label, usually on the driver’s side door jamb, details original equipment and compliance data․ Tire information labels display recommended tire sizes and pressures for optimal performance and safety․

Pay close attention to warning labels regarding fluids, maintenance, and potential hazards․ These labels are crucial for proper vehicle operation and ensuring a safe driving experience․ Refer to your owner’s manual for detailed explanations․

Operating Your Vehicle

Mastering your 2013 F-150’s operation involves understanding starting/stopping procedures and available driving modes, including the functionality of the 4×4 system for varied terrain․

Starting and Stopping the Engine

Proper engine operation is fundamental to your 2013 F-150 experience․ Ensure the vehicle is in Park or Neutral before attempting to start․ Familiarize yourself with the ignition system; a key is typically required for operation․

To start, insert the key and turn it to the ‘Start’ position, releasing once the engine engages․ For stopping, depress the brake pedal firmly and shift into Park․ Then, turn the ignition key to the ‘Off’ position and remove the key․ Always allow the engine to idle briefly before shutting down․

Driving Modes and Systems (e․g․, 4×4)

The 2013 F-150 offers versatile driving capabilities, including available four-wheel-drive (4×4) systems․ Understand the different modes – 2H, 4H, and 4L – and their appropriate usage․ 2H is for standard driving, 4H for moderate off-road or slippery conditions, and 4L for severe conditions requiring maximum traction․

Engage 4×4 only when needed, as continuous use can affect fuel efficiency․ Consult your owner’s manual for specific instructions on activating and disengaging the 4×4 system․

Interior Features & Controls

Explore the 2013 F-150’s cabin! Familiarize yourself with seat adjustments, the infotainment system, audio controls, and the climate control system for optimal comfort and convenience․

Seat Adjustments and Comfort Features

Personalize your driving experience! The 2013 Ford F-150 offers a range of seat adjustments, including manual or power controls for position, lumbar support, and recline․ Discover how to optimize your seating for long drives or demanding work․

Explore available comfort features like heated and cooled seats (depending on trim level) to enhance your journey in any weather․ Understanding these features ensures a comfortable and supportive ride, maximizing driver and passenger well-being․

Infotainment System & Audio Controls

Stay connected and entertained on the road! The 2013 F-150’s infotainment system provides access to audio controls, navigation (if equipped), and smartphone integration․ Learn to operate the system’s features, including AM/FM radio, CD player, and auxiliary inputs․

Master Bluetooth pairing for hands-free calling and audio streaming․ Explore the menu options to customize your audio settings and discover available features for a personalized listening experience during every drive․

Climate Control System

Maintain optimal comfort inside your 2013 F-150! The climate control system allows you to adjust temperature, fan speed, and airflow direction․ Understand the operation of the heating, ventilation, and air conditioning (HVAC) system for year-round comfort․

Learn how to utilize features like defrost and recirculation to quickly clear windows and improve air quality․ Familiarize yourself with the dual-zone climate control (if equipped) for personalized temperature settings for both driver and passenger․

Exterior Features & Operation

Explore the exterior functions of your 2013 F-150! This section details lights, signals, mirrors, and wipers – essential for safe and effective vehicle operation․

Lights and Signals

Understanding your 2013 F-150’s lighting system is vital for visibility and safety․ This includes headlights (high and low beam operation), turn signals, parking lights, brake lights, and hazard flashers․

The manual details how to adjust headlight aiming for optimal illumination․ It also explains the function of the fog lights, if equipped, and proper usage in varying weather conditions․ Familiarize yourself with the signal indicators and ensure all bulbs are functioning correctly for clear communication on the road․

Mirrors and Wipers

Properly adjusting your 2013 F-150’s mirrors – both exterior and interior – is essential for maximizing visibility and safe driving․ The owner’s manual provides detailed instructions on manual and power mirror adjustments․

It also covers the operation of the windshield wipers, including various speed settings and the use of the washer fluid․ Learn about the rear window wiper/defroster functionality for improved visibility in inclement weather․ Maintaining clear visibility is paramount for safe operation․

Maintenance & Service

Regular maintenance extends your 2013 F-150’s life! The manual details a recommended schedule for fluid checks, replacements, and overall vehicle upkeep for optimal performance․

Recommended Maintenance Schedule

Staying current with scheduled maintenance is vital for your 2013 F-150’s longevity and reliability․ The owner’s manual outlines specific intervals for essential services, including oil and filter changes, tire rotations, and fluid level inspections․

These intervals are based on normal driving conditions; severe usage – like towing or off-roading – may require more frequent attention․ Regularly checking and replacing air filters, inspecting belts and hoses, and servicing the cooling system are also key components of the recommended schedule․

Adhering to this schedule helps prevent unexpected breakdowns and ensures your F-150 continues to perform at its best․

Fluid Checks and Replacements

Maintaining proper fluid levels is essential for the smooth operation of your 2013 F-150․ Regularly check engine oil, coolant, brake fluid, power steering fluid, and transmission fluid․ The owner’s manual specifies the correct types and levels for each․

Scheduled fluid replacements – like coolant flushes and transmission fluid changes – are crucial to prevent corrosion and maintain optimal performance․ Inspect for leaks and address them promptly․ Using the recommended fluids ensures compatibility and protects vital components․

Troubleshooting & Emergency Procedures

Be prepared for the unexpected! Your manual details procedures for jump starting and changing a tire, ensuring roadside safety and minimizing downtime․

Jump Starting Procedures

Safely revive a discharged battery with these steps․ First, position a properly functioning vehicle close enough for the jumper cables to reach, avoiding contact․ Connect the positive (+) cable to the disabled vehicle’s positive terminal, then to the assisting vehicle’s positive terminal․ Next, connect the negative (-) cable to the assisting vehicle’s negative terminal, and finally, to a grounded metal surface on the disabled vehicle – not the battery terminal․ Start the assisting vehicle, let it run, then attempt to start the disabled one․

Tire Changing Instructions

Replace a flat tire safely and efficiently with these guidelines․ Park on a level surface, engage the parking brake, and gather your spare tire, jack, and lug wrench․ Loosen the lug nuts before jacking up the vehicle․ Position the jack correctly, raise the vehicle until the flat tire is off the ground, and fully remove the lug nuts․ Carefully remove the flat tire and mount the spare, tightening the lug nuts in a star pattern․ Lower the vehicle and fully tighten the lug nuts․

Factory Service Manual Access

Ford Service provides access to the 2013 F-150 manuals, offering a 26/72-hour subscription option for detailed repair information and diagnostics․

Ford Service Online Manual Access

Accessing the comprehensive 2013 F-150 factory service manuals is now streamlined through Ford Service online․ This platform offers a subscription-based service, granting temporary access – specifically, 26 hours within a 72-hour period – to a wealth of technical data․

This includes detailed repair procedures, component diagrams, and troubleshooting guides․ Keep in mind that the complete set consists of three distinct books: the main service manual, a dedicated wiring diagrams manual, and a separate engine diagnostic book, each providing specialized information for your vehicle’s maintenance and repair needs․

Availability of Wiring Diagrams & Engine Diagnostics

While the main 2013 F-150 factory service manual provides extensive repair information, it doesn’t encompass everything․ Specifically, detailed wiring diagrams and dedicated engine diagnostic procedures are found in separate, supplementary books․

Currently, locating these specialized manuals in the same convenient PDF format as the main service guide can be challenging․ Owners seeking this level of detail may need to explore alternative resources or consider the Ford Service online subscription for potential access․

Owners Manual Guide Book Information

A 2013 Ford F-150 Owners Manual Guide Book is available for purchase on Amazon․com, offering a technical editor’s insights and free shipping options․

Availability on Amazon

Finding a dedicated guide for your 2013 F-150 is now convenient! Amazon․com lists the “2013 Ford F150 Owners Manual Guide Book” authored by a Technical Editor․ This resource provides detailed information specifically tailored to your truck’s operation and maintenance․

Customers benefit from potential free shipping offers when purchasing through Amazon, making it an accessible option for owners seeking a comprehensive manual beyond the standard documentation․ Check current pricing and availability directly on the Amazon website for the most up-to-date details․

Technical Editor Details

The “2013 Ford F150 Owners Manual Guide Book” is crafted by a dedicated Technical Editor, ensuring accuracy and clarity for F-150 owners․ While specific details about the editor’s background aren’t readily available in the provided information, their role is vital in compiling a user-friendly and informative resource․

This expertise translates to a manual focused on practical application, assisting owners in understanding their vehicle’s features and resolving common issues․ The editor’s work aims to supplement the official Ford documentation with a more accessible guide․

Understanding the Three Manuals

The 2013 F-150 service information is split into three books: a main manual, a dedicated wiring diagrams volume, and a separate engine diagnostic resource․

Main Service Manual Contents

The primary 2013 F-150 service manual provides comprehensive repair procedures and detailed specifications for most vehicle components․ However, it’s important to note this foundational resource doesn’t include the intricate wiring schematics or specialized engine diagnostic information․

Owners seeking those details will need to access the supplementary wiring diagrams manual and the engine diagnostic book separately․ This main volume covers everything from basic maintenance to complex system overhauls, offering a solid base for both DIY mechanics and professional technicians working on your truck․

Wiring Diagrams Manual

The dedicated wiring diagrams manual for the 2013 F-150 is essential for any electrical work performed on the vehicle․ Unlike the main service manual, this resource focuses exclusively on the complex network of wires, connectors, and circuits throughout the truck․

It provides detailed schematics crucial for diagnosing electrical faults, performing modifications, or installing aftermarket accessories․ Accessing this manual is vital when dealing with any electrical issue, ensuring accurate repairs and preventing further complications․

Engine Diagnostic Book

The 2013 F-150 engine diagnostic book is a specialized resource for pinpointing issues within the powertrain․ It complements the main service manual by offering in-depth procedures for diagnosing engine-specific problems, utilizing diagnostic trouble codes (DTCs) and testing protocols․

This manual is invaluable for mechanics and experienced DIYers tackling complex engine repairs, ensuring accurate diagnoses and efficient resolutions․ It’s a critical component for maintaining optimal engine performance․

Byvella

muk luks size guide

Muk Luks Size Guide: Comprehensive Information (Updated 03/16/2026)

Discover accurate sizing for Muk Luks! This guide, updated today, March 16, 2026, ensures a perfect fit for all styles, from classic designs to boots and slippers.

Understanding Muk Luks: A Brand Overview

Muk Luks, originating as a Canadian footwear company, has blossomed into a globally recognized brand celebrated for its cozy and comfortable designs. Initially focused on traditional Mukluks – soft, indigenous footwear – the brand has expanded its offerings to encompass a diverse range of styles, including boots, slippers, and accessories. The core philosophy revolves around providing accessible comfort and quality, appealing to a broad customer base.

While rooted in practicality for cold climates, Muk Luks has successfully transitioned into a fashion-forward brand, frequently incorporating trendy colors and materials. The brand’s popularity stems from its commitment to creating products that are both stylish and incredibly comfortable for everyday wear. Understanding this evolution is key when considering sizing, as different styles may have varying fits. The brand consistently aims to deliver value and warmth, making it a staple in many wardrobes.

What are Muk Luks?

Muk Luks are a type of traditional footwear originating with the Inuit and other Indigenous peoples of Arctic regions. Historically crafted from animal hides – often caribou or sealskin – they were designed to provide exceptional warmth and insulation in extremely cold temperatures. The name “Mukluk” itself comes from the Yupik word for boot.

Modern Muk Luks, as popularized by the brand, retain the core principle of warmth and comfort but are often constructed from synthetic materials like fleece and polyester. They typically feature a soft, flexible sole and a snug, sock-like fit. While the original purpose was purely functional, today’s Muk Luks are widely enjoyed as comfortable indoor and outdoor footwear. Understanding their origins helps appreciate the emphasis on a close fit for optimal insulation, influencing sizing considerations.

Muk Luks Materials and Construction

Muk Luks utilize a variety of materials impacting fit and feel. Traditional Muk Luks employed caribou or sealskin, offering natural insulation and durability. Contemporary versions frequently feature faux fur linings – often polyester – providing a plush, cozy interior. The outer shell can range from suede or leather to knitted fabrics and water-resistant materials.

Construction methods also vary. Many Muk Luks are hand-crafted or utilize a combination of machine and hand-stitching. The sole is typically made of rubber or a synthetic compound, offering traction and flexibility. The lack of a rigid structure in many styles means the fit relies heavily on the stretch and give of the materials. This inherent flexibility is a key factor when determining the appropriate size, as a snug fit is often preferred to prevent slippage and maintain warmth.

Muk Luks Sizing: General Principles

Achieving the perfect Muk Luks fit requires careful consideration! Understanding sizing nuances, accurate measurements, and style-specific recommendations are crucial for optimal comfort and warmth.

Muk Luks Run Small, Large, or True to Size?

Generally, Muk Luks tend to run slightly small. Many customers report needing to size up, particularly when wearing thicker socks or if you are between sizes. This is a common observation across various Muk Luks styles, including the classic Muk Luks and boot variations.

However, it’s not a universal rule. Some styles, especially those with more structured designs or added insulation, may fit closer to true size. Therefore, relying solely on your usual shoe size isn’t recommended.

Considering the materials – often sheepskin or a sheepskin blend – Muk Luks will stretch and mold to your foot with wear. Initial snugness is often desired, as they will expand. But starting with a size too large can lead to slippage and reduced warmth. Always prioritize accurate foot measurement and consult the specific size chart for the style you’re interested in.

Key Considerations Before Measuring

Accurate measurement is crucial for Muk Luks sizing! Before you begin, wear the socks you intend to wear with your Muk Luks. Sock thickness significantly impacts fit, especially given the naturally accommodating nature of the materials.

Measure your feet at the end of the day, as they tend to swell slightly throughout the day. Stand with your weight evenly distributed. Trace your foot on a piece of paper, ensuring the pen is held vertically. Measure the length from the heel to the tip of your longest toe – this is your foot length.

Measure both feet, as sizes can vary. Use the larger measurement for size selection. Remember Muk Luks are designed for comfort and a snug fit, but avoid measuring with overly tight pressure. Consider width; if you have wider feet, you may need to size up even if the length appears correct.

Tools You’ll Need for Accurate Measurement

Gathering the right tools ensures a precise Muk Luks fit! You’ll need a few simple items to accurately determine your size. First, a ruler or measuring tape is essential – preferably one with both inches and centimeters for versatility. A flexible tape measure is ideal for conforming to the shape of your foot.

A piece of paper larger than your foot is necessary for tracing. Plain white paper works best for clear outlines. A pen or pencil is needed for tracing; a pen provides a bolder, more defined line.

Optionally, a sock of the thickness you plan to wear with your Muk Luks is highly recommended. This accounts for added volume. Finally, having a helper can be beneficial, especially for ensuring the measuring tape remains straight and accurate during the process. These simple tools will set you up for success!

Detailed Muk Luks Size Charts

Find your perfect Muk Luks fit with our comprehensive charts! We provide detailed sizing information for women, men, and children, including conversions and foot length guides.

Women’s Muk Luks Size Chart

Navigating women’s Muk Luks sizing requires careful attention. Muk Luks often run slightly small, so considering this is crucial for optimal comfort. Our chart details both US and Canadian size conversions, ensuring accuracy regardless of your location.

Foot length is the most reliable measurement; Use a ruler or measuring tape to determine your foot length in inches or centimeters. Then, consult the following chart to find the corresponding Muk Luks size. Remember to measure both feet, as sizes can vary slightly.

We recommend rounding up if you are between sizes. This will provide a more comfortable fit, especially if you plan to wear thicker socks. Consider the style of Muk Luks you are purchasing; boots may require a slightly different approach than classic slippers. Always prioritize a snug, but not constricting, fit for maximum enjoyment.

US to Canadian Size Conversion

Understanding the difference between US and Canadian shoe sizes is vital when purchasing Muk Luks. While generally similar, slight variations exist that can impact your fit. This conversion chart provides a straightforward guide to ensure you select the correct size, regardless of where you’re shopping from.

Typically, a US size corresponds to a slightly larger Canadian size. For example, a US Women’s size 8 often translates to a Canadian size 8.5 or 9. However, it’s not a universal rule, and discrepancies can occur between brands.

Below is a common conversion table:

  • US 5 | Canadian 5.5 — 6
  • US 6 | Canadian 6.5 — 7
  • US 7 | Canadian 7.5 ౼ 8
  • US 8 | Canadian 8.5 — 9
  • US 9 | Canadian 9.5 — 10
  • US 10 | Canadian 10.5 — 11

Always double-check with the specific Muk Luks size chart for the most accurate information.

Foot Length to Muk Luks Size

Determining your foot length is the most precise method for finding your ideal Muk Luks size. Unlike relying solely on standard US or Canadian sizes, measuring your foot ensures a comfortable and accurate fit, minimizing the risk of ordering the wrong size.

To measure, place your foot flat on a piece of paper and trace its outline. Measure the distance from the heel to the longest toe in inches or centimeters. Then, consult the following chart to find the corresponding Muk Luks size.

Here’s a general guideline:

  • Foot Length 9 inches | Muk Luks Size 6
  • Foot Length 9.5 inches | Muk Luks Size 7
  • Foot Length 10 inches | Muk Luks Size 8
  • Foot Length 10.5 inches | Muk Luks Size 9
  • Foot Length 11 inches | Muk Luks Size 10

Remember to measure both feet, as sizes can vary slightly. Use the measurement of the larger foot for the best fit. Always refer to the official Muk Luks size chart for the most up-to-date and accurate information.

Men’s Muk Luks Size Chart

Finding the right fit for men’s Muk Luks requires careful attention to sizing, as variations can occur. This chart provides a comprehensive guide to ensure optimal comfort and warmth. Men’s Muk Luks generally run true to size, but considering sock thickness is crucial for a perfect fit, especially with boots.

US to Canadian Size Conversion: Men’s sizes are typically consistent between the US and Canada. However, always double-check the specific product description for any discrepancies.

Foot Length is Key: For the most accurate sizing, measure your foot length in inches or centimeters. Compare your measurement to the chart below:

  • Foot Length 10.5” – Size 9
  • Foot Length 11” – Size 10
  • Foot Length 11.5” – Size 11
  • Foot Length 12” – Size 12
  • Foot Length 12.5” – Size 13

Consider Width: If you have wider feet, you may want to consider sizing up half a size for a more comfortable fit. Refer to the detailed foot length chart for precise measurements.

Generally, Muk Luks sizing remains consistent between the United States and Canada, simplifying the conversion process for shoppers. However, it’s always prudent to verify specific product details, as minor variations can occasionally occur depending on the style and retailer.

For most Muk Luks styles, a direct size correlation exists: A US Men’s size 9 typically corresponds to a Canadian Men’s size 9. Similarly, a US Women’s size 7 equates to a Canadian Women’s size 7. Children’s sizes also maintain this one-to-one relationship.

To ensure accuracy, especially when ordering online, it’s recommended to consult the specific size chart provided by the retailer. Some retailers may offer slightly different conversions. Always prioritize the size chart associated with the particular Muk Luks product you are purchasing.

When in doubt, measuring your foot length and comparing it to the detailed size charts (found elsewhere in this guide) is the most reliable method for determining your correct Muk Luks size, regardless of country.

Determining your Muk Luks size based on foot length is the most accurate method for a comfortable fit. This method minimizes guesswork and reduces the likelihood of returns due to incorrect sizing.

To measure, place a piece of paper against a wall and stand with your heel against the wall. Mark the longest point of your toe. Measure the distance from the wall to the mark in inches or centimeters. Repeat with the other foot, as sizes can vary.

Use the following as a general guideline (always refer to the specific size chart for the style you’re purchasing):

  • Women’s: 9 inches = Size 7, 9.25 inches = Size 8, 9.5 inches = Size 9
  • Men’s: 10 inches = Size 8, 10.5 inches = Size 9, 11 inches = Size 10

Remember these are approximate values. Muk Luks often have a relaxed fit, but precise foot length measurement ensures optimal comfort. Consider wearing the socks you intend to wear with your Muk Luks when measuring for the most accurate result.

Children’s Muk Luks Size Chart

Finding the right size for little feet is crucial for comfort and safety. Children’s Muk Luks sizing can be tricky as feet grow rapidly. This chart provides a helpful guide, but remember it’s approximate, and individual growth rates vary.

Age-based sizing is a starting point, but foot length is the most reliable indicator. Regularly measure your child’s feet (every 2-3 months) to ensure a proper fit. Avoid purchasing sizes “to grow into,” as ill-fitting Muk Luks can be uncomfortable and potentially unsafe.

Consider the sock thickness your child will typically wear with their Muk Luks. A thicker sock may require a slightly larger size. Prioritize comfort and allow for wiggle room to accommodate growing feet.

Always consult the specific size chart associated with the particular style of children’s Muk Luks you are purchasing, as variations can occur between different designs;

Age-Based Sizing Guide (Approximate)

Please note: This age-based guide is a general approximation only. Individual children grow at different rates, and foot size doesn’t always correlate directly with age. Always prioritize measuring foot length for the most accurate fit.

Infants (0-12 months): Typically range from size 3-6 Infant to 8 Toddler.
Toddlers (1-3 years): Generally fit sizes 8 Toddler to 10 Toddler.
Preschoolers (3-5 years): Usually require sizes 10 Toddler to 13 Youth.
School-Age Children (5-8 years): Commonly wear sizes 13 Youth to 2 Youth.
Older Children (8-12 years): Often fit sizes 2 Youth to 5 Youth.

These ranges are broad and should be used as a starting point. Regular foot measurements are essential. Remember to account for sock thickness when determining the appropriate size. This guide is intended to assist, but foot length measurements remain the most reliable method for ensuring a comfortable and secure fit for your child’s Muk Luks.

Accurate foot length measurement is crucial! Use our chart below as a guide, but remember slight variations can occur between styles. Measure both feet, as sizes can differ. Use the larger measurement for the best fit.

Women’s:

  • 8.5 inches = Size 7
  • 9 inches = Size 8
  • 9.5 inches = Size 9
  • 10 inches = Size 10
  • 10.5 inches = Size 11

Men’s:

  • 9.5 inches = Size 9
  • 10 inches = Size 10
  • 10.5 inches = Size 11
  • 11 inches = Size 12
  • 11.5 inches = Size 13

Children’s: (Approximate ౼ see Age-Based Guide too)

  • 6 inches = Size 10 Toddler
  • 6.5 inches = Size 11 Toddler
  • 7 inches = Size 12 Toddler

Specific Muk Luks Styles & Sizing

Different Muk Luks styles require tailored sizing approaches! Boots may need extra room, while slippers prioritize a snug fit for ultimate comfort and warmth.

Classic Muk Luks: Sizing Recommendations

Navigating the fit of classic Muk Luks requires careful consideration. These iconic styles, known for their cozy comfort, often run slightly small. We generally recommend ordering a half size up from your usual shoe size, especially if you plan on wearing thick socks. However, individual preferences vary, so consider your foot width and desired level of snugness.

For those between sizes, opting for the larger size is usually the better choice to avoid constriction. Remember that the genuine sheepskin lining will mold to your foot over time, providing a more customized fit. Pay close attention to the foot length measurements in our size charts – these are the most reliable indicators of a proper fit. Don’t solely rely on your standard shoe size, as it can differ between brands and styles; Prioritize comfort and allow for natural foot movement when selecting your classic Muk Luks.

Muk Luks Boots: Sizing for Different Heights

Muk Luks boots present unique sizing considerations due to varying shaft heights. Unlike classic Muk Luks, boot fit is influenced by calf circumference as well as foot length. For shorter shaft boots, sticking with a half size up from your usual shoe size is often sufficient, mirroring the recommendation for classic styles. However, taller boots require more attention.

If you have wider calves, consider sizing up a full size to ensure comfortable movement and avoid constriction. Measure your calf circumference at the widest point and compare it to the boot’s specifications. Remember that sheepskin lining will compress slightly with wear, but it’s better to err on the side of a looser fit initially. Always prioritize comfort and allow room for layering socks, especially during colder months. Refer to the detailed size charts, paying attention to both foot length and calf measurements, for the most accurate fit.

Muk Luks Slippers: Sizing for Comfort

Achieving ultimate comfort with Muk Luks slippers hinges on proper sizing. Generally, Muk Luks slippers are designed for a relaxed fit, prioritizing coziness. However, it’s crucial to avoid slippers that are too loose, as this can lead to slippage and reduced warmth. A common recommendation is to size up half a size from your usual shoe size, allowing for natural foot expansion and sock thickness.

Consider the slipper style; some feature more generous fits than others. If you prefer a snugger feel, or plan to wear thin socks, your regular shoe size might suffice. For those with wider feet, sticking with the half-size up is still advisable. Prioritize foot length measurement, as slipper sizing primarily focuses on this dimension. Remember, the goal is a comfortable, secure fit that keeps your feet warm and happy without feeling restrictive.

Troubleshooting Muk Luks Fit Issues

Don’t settle for discomfort! We’ll guide you through resolving fit problems – whether your Muk Luks are too tight, too loose, or require an exchange;

What to Do if Your Muk Luks are Too Tight

Experiencing a snug fit with your new Muk Luks? Don’t immediately assume they’re the wrong size! Muk Luks are designed to mold to your feet with wear, stretching slightly over time. Initially, they may feel a bit firm. Try wearing them around the house with thick socks to gently encourage expansion.

If this doesn’t provide sufficient relief, consider using a Muk Luk stretcher – a specialized tool available online – to carefully widen the boot or slipper. Avoid using harsh stretching methods like heat, as this can damage the materials.

Remember that certain styles, particularly those with tighter linings or less give in the construction, may require a half size up for optimal comfort. If, after attempting these methods, your Muk Luks remain uncomfortably tight, review the return and exchange policy (detailed elsewhere in this guide) to explore your options. Prioritize comfort and proper circulation!

What to Do if Your Muk Luks are Too Loose

Finding your Muk Luks a little too roomy? A slightly loose fit isn’t necessarily a problem, as many enjoy the relaxed feel. However, if excessive looseness compromises support or causes slippage, several solutions exist. Start by wearing thicker socks – wool or fleece socks can significantly improve the fit, especially during colder months.

Consider adding an insole! A thin, cushioned insole can take up valuable space within the Muk Luk, providing a more secure and comfortable fit. For styles with removable liners, replacing the existing liner with a thicker one is also an option.

If these adjustments aren’t enough, and you’ve already worn the Muk Luks, carefully review the return/exchange policy. While worn items may not always be eligible, it’s worth investigating. Remember, a secure fit is crucial for enjoying the full benefits of your Muk Luks!

Muk Luks Return and Exchange Policy

Understanding the Muk Luks return and exchange policy is vital for a stress-free shopping experience. While specific details can vary depending on the retailer and purchase location, generally, unworn Muk Luks with original tags attached are eligible for a full refund or exchange within a specified timeframe – typically 30 to 60 days from the date of purchase.

However, items showing signs of wear, damage, or alterations may not qualify for a return or exchange. It’s crucial to retain your proof of purchase (receipt or order confirmation) as it’s required for all returns and exchanges. Some retailers may offer free return shipping, while others require the customer to cover the cost.

Always check the specific return policy of the store where you purchased your Muk Luks before initiating a return. Online purchases often have slightly different procedures than in-store purchases. Familiarizing yourself with these guidelines ensures a smooth process if adjustments are needed.

Byvella

1734 ib8s manual

Navigating the digital landscape requires robust support‚ and understanding legacy systems alongside modern tools is crucial. Microsoft provides extensive resources‚
bridging older technologies with its current suite of applications‚ offering a seamless user experience for all productivity needs.

Context: The Relevance of Manuals in a Microsoft-Driven World

Despite the pervasive nature of Microsoft’s intuitive interfaces and readily available online support‚ the enduring relevance of dedicated manuals‚ like the 1734 ib8s documentation‚ cannot be understated. In a world increasingly reliant on digital solutions – encompassing Microsoft 365‚ Windows 11‚ and Azure – understanding foundational systems remains paramount.

These older manuals often contain critical‚ specific information not easily found within the broader Microsoft ecosystem. They provide detailed insights into hardware configurations‚ troubleshooting steps‚ and operational procedures unique to the 1734 ib8s. While Microsoft offers comprehensive how-to articles‚ videos‚ and training for its current products‚ bridging the gap between legacy technology and modern software requires referencing original documentation.

The ability to consult a dedicated manual empowers users to effectively integrate older systems with contemporary Microsoft tools‚ maximizing efficiency and minimizing compatibility issues. It’s about preserving knowledge and ensuring continued functionality in a constantly evolving technological landscape.

Overview of the 1734 ib8s – What is it? (Limited Information Available)

Information regarding the “1734 ib8s” is currently scarce‚ presenting a challenge in providing a comprehensive overview. Based on available context‚ it appears to be a legacy system‚ potentially a hardware component or a specific software application predating the widespread adoption of the Microsoft ecosystem. Its function remains largely undefined without access to the original manual.

The limited information suggests it may relate to industrial control systems or specialized computing environments. Understanding its purpose is crucial for integration with modern Microsoft tools like Windows 11 or Azure‚ but requires referencing the 1734 ib8s documentation itself.

Given the age of the system‚ support resources are likely limited to the original manual and potentially online forums dedicated to vintage technology. Further research is needed to fully ascertain its capabilities and relevance in today’s digital world.

Accessing Microsoft Support Resources

While direct 1734 ib8s support is unlikely through Microsoft‚ their extensive help articles‚ videos‚ and training cover broader compatibility and integration scenarios.

Official Microsoft Support Website

The primary gateway for assistance is the official Microsoft Support website. Though dedicated 1734 ib8s documentation won’t be found directly‚ the site offers a wealth of information applicable to broader compatibility issues. Users can search for troubleshooting guides related to connecting older hardware or software with modern Windows versions‚ like Windows 11.

The website provides how-to articles‚ video tutorials‚ and community forums. These resources can assist in diagnosing potential conflicts or finding workarounds for integrating the 1734 ib8s with current Microsoft products. Focus your searches on topics like “legacy device support‚” “driver compatibility‚” or “hardware troubleshooting.” Microsoft’s support extends to Microsoft 365‚ Copilot‚ Surface devices‚ and Azure‚ offering a comprehensive knowledge base. Remember to clearly define your issue when searching for relevant solutions.

Microsoft 365 Support Channels

While direct support for a 1734 ib8s manual isn’t available through Microsoft 365 channels‚ the platform’s broader support network can indirectly assist with related issues. If the 1734 ib8s interacts with Microsoft applications like Word or Excel (perhaps through data transfer or control)‚ accessing Microsoft 365 support can resolve compatibility problems.

Support is offered via online chat‚ phone‚ and community forums. These channels are best utilized when the issue manifests within a Microsoft 365 application. For example‚ if data from the 1734 ib8s causes errors in Excel‚ Microsoft support can investigate. Remember to clearly articulate the problem‚ specifying the interaction between the legacy system and Microsoft 365. Explore the Microsoft 365 help center for relevant articles and troubleshooting steps‚ focusing on data import/export or device connectivity.

Microsoft 365: A Core Component

Though not directly linked to the 1734 ib8s‚ Microsoft 365 provides essential productivity tools and cloud services for managing data potentially generated by the system.

Microsoft 365 Subscriptions – Overview & Benefits

While the 1734 ib8s manual represents a different technological era‚ modern data management often necessitates a transition to cloud-based solutions like Microsoft 365. Subscriptions offer a comprehensive suite of applications – Word‚ Excel‚ PowerPoint‚ Outlook‚ and more – designed to enhance productivity and collaboration.

Benefits extend beyond the core applications‚ encompassing secure cloud storage via OneDrive‚ advanced security features protecting sensitive information‚ and continuous updates ensuring access to the latest functionalities. Different tiers cater to varying needs‚ from personal use to large enterprises.

For organizations potentially dealing with data originating from systems like the 1734 ib8s‚ Microsoft 365 provides a centralized platform for storage‚ analysis‚ and reporting‚ facilitating a smoother integration between legacy and contemporary workflows. The subscription model ensures ongoing support and access to innovative features‚ including AI-powered tools.

Free Online Versions of Microsoft Office Applications

Acknowledging the potential need to access or convert data from the 1734 ib8s system‚ Microsoft offers free online versions of its core Office applications – Word‚ Excel‚ PowerPoint‚ and OneNote. These web-based tools provide a convenient way to view‚ create‚ and edit documents without requiring a paid Microsoft 365 subscription.

While functionality is somewhat limited compared to the desktop versions‚ they are perfectly suitable for basic tasks like opening and reviewing files potentially exported from older systems. This accessibility allows users to interact with data originating from the 1734 ib8s without immediate investment in a full software suite.

Furthermore‚ these online applications seamlessly integrate with OneDrive‚ enabling cloud storage and access from any device with an internet connection‚ simplifying data sharing and collaboration.

Key Microsoft Applications & Their Functionality

Microsoft’s suite empowers users to manage data‚ create compelling content‚ and communicate effectively. These tools offer pathways for interacting with information‚ potentially from legacy systems.

Microsoft Word: Document Creation & Editing

Microsoft Word remains a cornerstone of document creation‚ offering a versatile platform for composing‚ editing‚ and formatting text-based content. Users can leverage a wide array of features‚ from basic text manipulation to advanced layout options‚ ensuring professional-looking documents. The application supports various file formats‚ facilitating compatibility and collaboration.

While the 1734 ib8s manual’s direct integration with Word is unlikely‚ information from that manual could be readily transcribed and formatted within Word. This allows for digital preservation and easier searching of potentially outdated or hard-to-read documentation. Word’s accessibility features also enhance usability‚ making it easier to work with complex technical information. Furthermore‚ cloud integration via OneDrive ensures documents are safely stored and accessible across multiple devices‚ streamlining workflows and promoting data security;

Microsoft Excel: Spreadsheet Management

Microsoft Excel excels at organizing‚ analyzing‚ and visualizing data‚ making it an invaluable tool for various tasks. Its grid-based interface and powerful formulas enable users to perform complex calculations‚ create charts‚ and generate reports efficiently. Excel’s versatility extends to data management‚ allowing for sorting‚ filtering‚ and data validation.

Information contained within the 1734 ib8s manual‚ particularly any numerical data‚ specifications‚ or performance metrics‚ could be effectively organized and analyzed using Excel. Creating spreadsheets to track component lists‚ maintenance schedules‚ or troubleshooting steps would enhance accessibility and understanding. Excel’s charting capabilities could visually represent data from the manual‚ revealing trends or patterns. Utilizing OneDrive integration ensures data security and collaborative access‚ facilitating knowledge sharing and streamlined documentation management related to the 1734 ib8s system.

Microsoft PowerPoint: Presentation Design

Microsoft PowerPoint empowers users to create visually engaging presentations‚ effectively communicating information through slides‚ images‚ and multimedia. Its intuitive interface and diverse design tools facilitate the development of compelling narratives‚ ideal for training sessions‚ reports‚ or demonstrations. PowerPoint supports various media formats‚ enhancing presentation impact and audience engagement.

Content derived from the 1734 ib8s manual – such as system overviews‚ operational procedures‚ or troubleshooting guides – could be transformed into a clear and concise PowerPoint presentation. Visual aids like diagrams and screenshots‚ extracted from the manual‚ would greatly improve comprehension. Utilizing PowerPoint’s animation features can illustrate complex processes. Storing the presentation on OneDrive ensures easy access and collaborative editing‚ making it a valuable resource for sharing knowledge about the 1734 ib8s with colleagues or trainees.

Microsoft Outlook: Email & Calendar Management

Microsoft Outlook serves as a central hub for communication and scheduling‚ seamlessly integrating email‚ calendar‚ contacts‚ and task management. It streamlines daily workflows‚ enabling efficient organization and collaboration. Outlook’s robust features‚ including rules‚ filters‚ and search capabilities‚ help users manage large volumes of information effectively.

Information pertaining to the 1734 ib8s manual – such as updates‚ maintenance schedules‚ or support requests – can be efficiently managed through Outlook. Dedicated folders can archive relevant email correspondence. Calendar invites can schedule training sessions or troubleshooting appointments related to the system. Sharing access to calendars facilitates team coordination. Storing key documentation links within Outlook provides quick access to the 1734 ib8s manual‚ ensuring prompt responses to inquiries and streamlined support processes.

Cloud Services: OneDrive Integration

Leveraging OneDrive allows secure document storage and accessibility‚ vital for the 1734 ib8s manual and related files‚ ensuring collaboration and data protection.

Storing Documents in OneDrive

OneDrive serves as a central‚ secure repository for all your digital assets‚ including crucial documentation related to the 1734 ib8s manual. This cloud-based storage solution offers a practical alternative to traditional physical manuals‚ mitigating risks of loss or damage. Uploading scanned copies of the 1734 ib8s manual‚ troubleshooting guides‚ and any supplementary materials ensures they are readily available whenever and wherever needed.

Furthermore‚ OneDrive’s version history feature allows you to revert to previous iterations of documents‚ safeguarding against accidental edits or data corruption. Utilizing OneDrive’s organizational tools‚ such as folders and tagging‚ facilitates efficient retrieval of specific information within the 1734 ib8s documentation. This streamlined approach enhances productivity and minimizes downtime when addressing technical issues or performing maintenance procedures.

Accessing Files from Any Device

OneDrive’s inherent accessibility empowers users to retrieve the 1734 ib8s manual and associated documentation from virtually any device with an internet connection. Whether utilizing a desktop computer‚ laptop‚ tablet‚ or smartphone‚ the information remains consistently available‚ fostering flexibility and responsiveness. This is particularly valuable for technicians working remotely or in the field‚ requiring immediate access to troubleshooting steps or technical specifications outlined in the manual.

Microsoft’s synchronization technology ensures that any changes made to the 1734 ib8s documentation are automatically updated across all connected devices‚ maintaining data consistency. This eliminates the need for manual file transfers and reduces the risk of working with outdated information. Secure access protocols protect sensitive data‚ ensuring the confidentiality of the 1734 ib8s system details.

Security Features within Microsoft 365

Robust Microsoft 365 security standards safeguard the 1734 ib8s manual and related data‚ ensuring confidentiality‚ integrity‚ and compliance with industry regulations.

World-Class Security Standards

Microsoft 365 employs a multi-layered security approach‚ vital when considering access to sensitive documentation like the 1734 ib8s manual. This includes advanced threat protection‚ actively defending against malware‚ phishing attempts‚ and ransomware. Data loss prevention (DLP) policies can be implemented to control sensitive information‚ preventing accidental or intentional sharing of the manual’s contents outside authorized channels.

Furthermore‚ Microsoft utilizes encryption both in transit and at rest‚ protecting the 1734 ib8s manual’s data from unauthorized access. Compliance features help organizations meet regulatory requirements‚ ensuring responsible data handling. Regular security assessments and updates are performed to address emerging threats‚ maintaining a robust security posture. Access controls‚ including multi-factor authentication‚ limit access to the manual based on user roles and permissions‚ bolstering overall security.

Data Protection & Privacy

Protecting data related to the 1734 ib8s manual‚ and user information accessing it‚ is paramount within the Microsoft ecosystem. Microsoft adheres to global privacy regulations‚ including GDPR and CCPA‚ ensuring responsible data handling practices. Data resides in geographically diverse and secure data centers‚ offering redundancy and resilience.

Users have control over their data‚ with options to access‚ modify‚ and delete personal information. Microsoft’s privacy dashboard provides transparency into data collection and usage. Encryption safeguards the 1734 ib8s manual’s content‚ preventing unauthorized access. Regular audits and certifications demonstrate commitment to data protection standards. Microsoft’s commitment extends to preventing unauthorized access and ensuring the confidentiality‚ integrity‚ and availability of sensitive information related to the manual.

Artificial Intelligence (AI) Enhancements

AI‚ like Microsoft Copilot‚ can potentially assist in understanding and navigating complex documentation‚ even for older systems like the 1734 ib8s.

Microsoft Copilot represents a significant leap in AI-powered assistance‚ designed to enhance productivity across various Microsoft applications. While directly interfacing with a legacy system like the 1734 ib8s might not be a native capability‚ Copilot’s strengths lie in its ability to synthesize information and generate summaries from complex texts.

Imagine feeding Copilot sections of the 1734 ib8s manual – if accessible in digital format – and asking it to explain specific functions or troubleshoot common issues. Copilot could potentially translate technical jargon into more understandable language‚ or even create step-by-step guides.

Furthermore‚ Copilot can assist in drafting documentation about the 1734 ib8s‚ aiding in knowledge transfer and preservation. It’s important to remember Copilot’s responses are based on the data it’s given‚ so accuracy relies on the quality of the source material. It’s a powerful tool for augmenting understanding‚ not replacing careful study of the original manual.

Premium AI Upgrades (E7 Bundle)

The potential benefits of Microsoft’s E7 bundle‚ offering premium AI enhancements‚ are intriguing when considering older systems like the 1734 ib8s. While direct integration is unlikely‚ the advanced capabilities could indirectly aid in understanding and maintaining such legacy technology.

Enhanced AI-powered search within Microsoft 365‚ part of the E7 bundle‚ could prove invaluable when researching the 1734 ib8s. Imagine quickly sifting through related documentation‚ forum posts‚ or archived materials. The bundle’s improved data analysis tools might also help identify patterns or anomalies within data generated by the ib8s‚ if accessible.

However‚ it’s crucial to acknowledge the limitations. The E7 bundle’s AI is trained on contemporary data; its understanding of a decades-old system will be limited. It’s a tool to assist analysis‚ not to automatically decipher the intricacies of the 1734 ib8s manual or its operation.

Account Management & Settings

Securely managing your Microsoft account provides access to essential services‚ though direct 1734 ib8s manual support isn’t available within these settings currently.

Managing Your Microsoft Account

Your Microsoft account serves as the central hub for accessing a wide range of services‚ including Microsoft 365 applications‚ OneDrive cloud storage‚ and Xbox gaming features. While direct support for a legacy system like the 1734 ib8s manual isn’t integrated into account management‚ maintaining a secure and up-to-date account is paramount for overall digital wellbeing.

Within your account settings‚ you can review and update your personal information‚ manage security preferences – such as two-factor authentication – and control privacy settings. Regularly reviewing these settings ensures your data remains protected. Furthermore‚ you can manage subscriptions‚ view billing history‚ and explore available support resources. Although the 1734 ib8s isn’t directly linked‚ a well-managed Microsoft account provides a foundation for utilizing modern tools effectively‚ potentially aiding in the digitization or archiving of information related to older systems.

Accessing Subscriptions & Settings

Navigating your Microsoft account’s subscriptions and settings is key to maximizing your digital experience‚ even when dealing with older systems like the 1734 ib8s. While a direct integration for managing documentation related to the ib8s isn’t available‚ understanding your current Microsoft 365 subscription level unlocks access to powerful tools.

You can view active subscriptions‚ manage payment methods‚ and explore upgrade options. The settings area allows customization of privacy preferences‚ security features (like two-factor authentication)‚ and regional settings; Though the 1734 ib8s manual isn’t directly managed here‚ utilizing OneDrive’s storage capacity – part of many subscriptions – offers a secure location to digitally archive any scanned documentation or notes related to the older system‚ ensuring long-term accessibility and preservation.

Microsoft Products & Services Beyond Office

Microsoft’s ecosystem extends far beyond Office‚ encompassing Windows‚ Surface‚ Xbox‚ and Azure. These diverse offerings provide a comprehensive technological foundation for modern computing.

Windows 11 Operating System

Windows 11 represents Microsoft’s latest desktop operating system‚ designed for a streamlined and intuitive user experience. It features a redesigned interface with a centered taskbar‚ rounded corners‚ and improved performance. Compatibility with a vast array of hardware and software remains a cornerstone of the Windows experience‚ ensuring broad accessibility for users.

Security enhancements are paramount in Windows 11‚ incorporating features like TPM 2.0 support and Secure Boot to protect against modern threats. The operating system also prioritizes productivity with features like Snap Layouts and Snap Groups‚ facilitating efficient multitasking. Regular updates deliver new features and security patches‚ keeping the system current and secure. Windows 11 seamlessly integrates with Microsoft’s cloud services‚ including OneDrive‚ enhancing data accessibility and collaboration.

Surface Devices

Microsoft’s Surface line embodies innovation in hardware‚ offering a diverse range of devices tailored to various needs. From the versatile Surface Pro – a 2-in-1 tablet and laptop – to the powerful Surface Laptop and the creative-focused Surface Studio‚ there’s a Surface device for almost every user. These devices are meticulously crafted‚ often featuring premium materials and high-resolution displays.

Surface devices are designed to seamlessly integrate with the Microsoft ecosystem‚ particularly Windows 11 and Microsoft 365. They often showcase the latest Windows features and are optimized for productivity applications like Word‚ Excel‚ and PowerPoint. The Surface Pen and Surface Dial further enhance creativity and precision. Microsoft continually refines the Surface line‚ pushing boundaries in design and functionality‚ providing a premium computing experience.

Xbox Gaming Ecosystem

Microsoft’s Xbox is more than just a console; it’s a comprehensive gaming and entertainment ecosystem. Xbox encompasses the Xbox Series X and Series S consoles‚ offering cutting-edge performance and immersive gaming experiences. Central to the Xbox experience is Xbox Game Pass‚ a subscription service providing access to a vast library of games.

Beyond the hardware‚ Xbox Live provides a robust online multiplayer network‚ fostering a community of gamers. Microsoft continually invests in exclusive game titles and studios‚ strengthening the Xbox content library. Integration with PC gaming through Xbox Play Anywhere allows seamless cross-platform play. The Xbox ecosystem extends to streaming services and entertainment apps‚ making it a versatile entertainment hub. Microsoft’s commitment to innovation ensures a dynamic and evolving gaming experience.

Azure Cloud Platform

Microsoft Azure is a leading cloud computing platform‚ offering a wide range of services to businesses and developers. It provides infrastructure as a service (IaaS)‚ platform as a service (PaaS)‚ and software as a service (SaaS) solutions‚ enabling scalability and flexibility. Azure supports various programming languages‚ frameworks‚ and operating systems‚ catering to diverse development needs.

Key Azure services include virtual machines‚ storage‚ databases‚ and networking. It also offers advanced capabilities like artificial intelligence‚ machine learning‚ and the Internet of Things (IoT). Azure’s global network of data centers ensures high availability and performance. Security is a paramount concern‚ with robust data protection and compliance features. Microsoft’s continuous innovation makes Azure a powerful and versatile cloud solution.

Byvella

plantronics cs540 manual

Plantronics CS540 Manual: A Comprehensive Guide

This comprehensive guide details the Plantronics CS540 wireless headset system, offering setup instructions, usage tips, and troubleshooting advice for optimal performance.

Overview of the Plantronics CS540 System

The Plantronics CS540 is a convertible wireless headset system designed for desk phone users, offering freedom of movement and professional audio quality. This system boasts a robust DECT (Digital Enhanced Cordless Telecommunications) technology, ensuring a secure and clear connection. A key feature is its versatility – users can switch between a comfortable headband style and a secure earhook, adapting to individual preferences and work environments.

The CS540 prioritizes ease of use, with intuitive call controls and a long-range wireless connectivity. It’s ideal for busy professionals needing hands-free communication. The system includes a base station for charging and connecting to your desk phone, and the headset itself is lightweight for extended wear. Detailed instructions within this manual will guide you through setup, operation, and maximizing the benefits of your new Plantronics CS540 system.

Unboxing and Kit Contents

Upon opening your Plantronics CS540 package, carefully verify that all components are present and undamaged. Your kit should include the following items: one CS540 wireless headset, a base station for charging and desk phone connectivity, a multi-charging cable (USB-A to Micro-USB), a power adapter for the base station, and two headset wearing options – a headband and an earhook – providing flexible comfort.

Additionally, you’ll find a quick start guide to assist with initial setup. Please retain the original packaging for potential warranty claims or returns. If any items are missing or appear damaged, immediately contact Plantronics customer support for assistance. A complete user manual (available as a PDF online) provides detailed instructions and troubleshooting information beyond the quick start guide.

System Components Identification

The Plantronics CS540 system comprises several key components. The headset itself features intuitive call control buttons and a noise-canceling microphone. The base station serves as both a charging cradle and a connection point to your desk phone; it houses LED indicators displaying system status. The headband offers a traditional over-the-head wearing style, while the earhook provides a secure, alternative fit.

The multi-charging cable is used to power the base station, and the power adapter connects to a standard wall outlet. Familiarize yourself with the location of the call answer/end, volume control, and mute buttons on the headset. Understanding the function of the LED indicators on the base station – indicating power, call status, and charging – is crucial for effective operation. Refer to the detailed diagrams in the user manual for visual identification.

Setting Up Your Plantronics CS540

Proper setup ensures optimal performance. This section guides you through base station connection, headset charging, and seamless integration with your existing desk phone system.

Base Station Setup and Power Connection

Positioning the Base Station: Place the base station on a stable, flat surface near a working AC power outlet and within a reasonable distance of your desk phone. Avoid placing it near sources of interference, such as microwave ovens or other electronic devices, as this could affect the wireless range.

Powering On: Connect the provided power adapter to the base station and plug it into the AC outlet. Ensure the connection is secure. The power indicator light on the base station should illuminate, indicating it is receiving power. If the light doesn’t illuminate, verify the power adapter is functioning correctly and the outlet is active.

Phone Line Connection: Connect the telephone line cord from your desk phone to the “Phone” port on the back of the base station. Then, connect another telephone line cord from the “Wall” port on the base station to the wall jack. This establishes the connection between your phone, the base station, and the telephone network.

Initial Synchronization: Upon powering on, the base station will automatically synchronize with the headset. This process may take a few moments. Ensure the headset is charged or has sufficient battery life for synchronization to occur successfully.

Headset Charging Procedures

Charging Cradle Connection: Place the headset into the charging cradle. Ensure the charging contacts on the headset align correctly with those on the cradle for a secure connection. A proper connection is crucial for efficient charging.

Power Source: Connect the charging cradle’s power adapter to a functioning AC power outlet. The charging indicator light on the cradle will illuminate, typically red or amber, indicating the headset is charging.

Charging Time: Allow approximately 3-4 hours for a full charge. The charging indicator light will usually change to green or turn off when the headset is fully charged. Avoid interrupting the charging process until completion to maximize battery lifespan.

Initial Charge: It is recommended to fully charge the headset before its initial use. This ensures optimal performance and battery capacity. Subsequent charges may take less time depending on the remaining battery level.

Connecting to Your Desk Phone

Locate Phone Ports: Identify the dedicated headset port on your desk phone. This is typically a 2.5mm or RJ9 jack, often labeled as “headset” or “HSP.” Consult your phone’s manual if you’re unsure of its location.

Connect the Base Station: Using the provided telephone cable, connect the Plantronics CS540 base station to the headset port on your desk phone. Ensure the connection is secure for optimal audio quality.

Test the Connection: After connecting, test the headset by making and receiving calls. Verify that you can hear dial tone, incoming calls, and speak clearly through the microphone.

Compatibility: The CS540 is designed to work with most standard desk phones. However, compatibility issues may arise with certain phone models. If you encounter problems, consult the Plantronics compatibility guide.

Using the Plantronics CS540

Effortlessly manage calls with the CS540! This section details answering, ending calls, volume adjustments, and microphone muting for seamless communication.

Answering and Ending Calls

Answering calls with your Plantronics CS540 is remarkably simple. When receiving an incoming call, press the call control button located on the base station or directly on the headset itself. A short press typically answers the call, initiating your conversation. To end a call, simply press the same call control button again – a single press will disconnect the current call.

The system offers intuitive call management. Some models may feature an auto-answer function, configurable through the base station settings. This allows the headset to automatically answer incoming calls after a specified ring time. Familiarize yourself with the specific button layout on your headset and base station, as slight variations may exist depending on the model. Consistent button presses ensure clear and efficient call handling, maximizing your productivity throughout the day.

Adjusting Volume Control

Controlling the volume on your Plantronics CS540 is straightforward, ensuring a comfortable listening experience. Dedicated volume control buttons are conveniently located on the headset itself, allowing for quick adjustments without interrupting your conversation. Typically, a ‘+’ button increases the volume, while a ‘-‘ button decreases it. Gentle presses are recommended for precise adjustments.

The volume level is adjustable across a wide range, catering to various preferences and noisy environments. Some base stations may also offer master volume control, affecting the overall output. Experiment with different volume settings to find the optimal level for clarity and comfort. Remember to start with a lower volume and gradually increase it to avoid sudden loud noises. Consistent volume adjustments enhance call quality and user satisfaction.

Muting and Unmuting the Microphone

The Plantronics CS540 offers a simple and effective microphone muting function, crucial for maintaining privacy during calls. A dedicated mute button, usually located on the ear cup of the headset, allows you to instantly silence your microphone. A clear auditory tone or visual indicator typically confirms mute status.

When muted, the other party will not be able to hear your voice, providing a discreet way to handle sensitive matters or avoid unwanted background noise transmission. Pressing the mute button again restores microphone functionality. Familiarize yourself with the mute button’s location for quick access during conversations. Proper microphone muting ensures professional call handling and protects confidential information. Regular testing of the mute function is recommended.

Advanced Features and Functionality

Explore the CS540’s versatile features, including adaptable wearing styles with headband and earhook options, call transfer capabilities, and conference calling support.

Switching Between Headset Wear Styles (Headband & Earhook)

The Plantronics CS540 offers exceptional flexibility with its convertible design, allowing users to choose between a comfortable headband and a secure earhook wearing style. To switch, gently detach the current style – either the headband or earhook – from the headset. The attachment points are designed for easy, tool-free removal and installation.

For the headband, align the headband arms with the corresponding slots on the headset and press firmly until they click into place. Ensure a snug, yet comfortable fit by adjusting the headband length. To attach the earhook, similarly align the earhook arm with the headset slot and press until secured. The earhook is designed to rest comfortably over the ear, providing a stable fit during movement.

Experiment with both styles to determine which best suits your individual preferences and work environment. The CS540’s adaptability ensures all-day comfort and a secure fit, regardless of your chosen wearing style;

Call Transfer and Conference Calling

The Plantronics CS540 facilitates seamless call management, including call transfer and, depending on your phone system’s capabilities, conference calling. To transfer a call, initiate the transfer function on your desk phone as you normally would. The CS540 transmits the audio clearly during the transfer process, ensuring a smooth handover.

For conference calling, first establish a call with the initial party. Then, using your desk phone, initiate a second call. Once connected, activate the conference call feature on your phone. The CS540 will blend the audio from both calls, allowing for multi-party conversations. Note: Conference calling functionality is heavily reliant on your specific phone system’s features and configuration.

Refer to your desk phone’s manual for detailed instructions on utilizing call transfer and conference calling features. The CS540 acts as a high-quality audio conduit, enhancing the clarity and convenience of these essential communication tools.

Understanding LED Indicators

The Plantronics CS540 utilizes LED indicators on both the headset and the base station to communicate system status at a glance. A solid green light on the base typically indicates a stable connection and power. Flashing green often signifies the headset is actively in a call. A red light generally signals the headset is charging, transitioning to green when fully charged.

On the headset itself, a flashing LED can indicate pairing mode or a low battery. A solid blue light may represent a successful Bluetooth connection (if applicable). Interpreting these signals allows for quick troubleshooting and ensures optimal performance. Consult the quick start guide for a detailed breakdown of each LED behavior.

Pay attention to the LED patterns as they provide valuable insights into the headset’s operational state, helping you maintain a consistent and reliable communication experience with your Plantronics CS540 system.

Troubleshooting Common Issues

This section addresses frequent problems with the Plantronics CS540, including audio disruptions, connectivity failures, and diminished battery life, offering practical solutions.

No Audio Issues

Experiencing no audio with your Plantronics CS540? Several factors could contribute to this problem. First, ensure the headset is adequately charged and properly connected to the base station. Verify the volume control on both the headset and your desk phone are turned up; sometimes, the simplest solutions are overlooked.

Next, check the mute function – accidentally muting the microphone will prevent audio transmission. Confirm the headset is selected as the active audio device on your phone system. If using a computer, review the sound settings to ensure the CS540 is the default input and output device.

For persistent issues, try resetting the base station by disconnecting and reconnecting the power supply. If the problem continues, consult the full user manual (plantronics-cs540.pdf) for advanced troubleshooting steps or contact Plantronics support for assistance.

Connectivity Problems

Encountering connectivity issues with your Plantronics CS540? Begin by verifying the base station is powered on and within range of the headset – typically up to 300 feet. Ensure there are no significant obstructions (walls, metal objects) interfering with the wireless signal. Check that the headset is properly paired with the base station; refer to the setup guide for re-pairing instructions.

If the connection remains unstable, try resetting both the headset and the base station. Disconnect the base station’s power, then briefly power cycle the headset. Reconnect the base station and attempt to re-establish the link. Interference from other wireless devices can also cause problems; try moving the base station away from potential sources of interference.

For ongoing difficulties, consult the detailed user manual (plantronics-cs540.pdf) for specific troubleshooting steps or reach out to Plantronics customer support.

Battery Life Concerns

Experiencing shorter than expected battery life with your Plantronics CS540? Several factors can contribute to this. Ensure the headset is fully charged before initial use and allow sufficient charging time between uses. Battery performance degrades over time, so older headsets may exhibit reduced capacity.

Verify the headset is charging correctly; the LED indicator should display a charging status. Excessive volume levels can also drain the battery faster. Consider lowering the volume to extend usage time. Environmental factors, such as extreme temperatures, can impact battery performance.

To maximize battery life, fully discharge and recharge the headset periodically. If problems persist, consult the user manual (plantronics-cs540.pdf) for battery care tips or contact Plantronics support for assistance.

Safety and Regulatory Information

Prioritize safety by following precautions outlined in the manual; ensure proper warranty registration and adhere to all regulatory compliance details provided.

Important Safety Precautions

To ensure safe operation of your Plantronics CS540, please adhere to the following guidelines. Avoid using the headset during lightning storms, as it presents a potential electrical hazard. Do not disassemble or attempt to repair the device yourself; contact qualified service personnel for assistance. Prolonged exposure to high volumes can damage your hearing, so maintain reasonable listening levels.

Keep the headset and base station away from water and excessive moisture to prevent damage. Regularly clean the headset with a soft, dry cloth. Avoid using abrasive cleaners or solvents. Ensure the power adapter is properly connected and undamaged. Do not operate the device if the power cord is frayed or damaged. Be mindful of the cord posing a tripping hazard. Always handle the battery with care and follow proper disposal guidelines. This device is intended for indoor use only.

Warranty Information

Plantronics offers a limited warranty for the CS540 system, protecting against defects in materials and workmanship. The standard warranty period is one year from the date of purchase, covering repair or replacement at Plantronics’ discretion. This warranty does not cover damage resulting from misuse, accidents, or unauthorized modifications. Proof of purchase is required to claim warranty service.

To initiate a warranty claim, contact Plantronics customer support through their official website or designated phone number. They will provide instructions for returning the defective unit. Shipping costs for warranty returns may be the responsibility of the customer. The warranty is non-transferable and applies only to the original purchaser. Extended warranty options may be available for purchase separately. Refer to the official Plantronics website for complete warranty details and terms.

Regulatory Compliance Details

The Plantronics CS540 system is designed to comply with various international regulatory standards, ensuring safety and minimizing interference. This includes adherence to FCC regulations in the United States, CE marking for European compliance, and other regional certifications. These certifications confirm the device meets specific electromagnetic compatibility (EMC) and safety requirements.

The CS540 operates within designated frequency bands, adhering to power level limitations set by regulatory bodies. Users should be aware of local regulations regarding wireless device usage. Plantronics provides documentation detailing compliance information on their website, including specific test reports and declarations of conformity. Proper disposal of the device is crucial, following local e-waste regulations to minimize environmental impact. Refer to the official Plantronics documentation for detailed compliance statements.